


Henny
-
Posts
193 -
Joined
-
Last visited
Content Type
Forums
Profiles
Events
Store
Posts posted by Henny
-
-
How sturdy is your bench? If there is flexing when you operate the machine, that's what could be tipping your primers.
-
I guess I should have also mentioned, is your shell plate too loose and are the rounds you're checking loaded when the shell plate was full?
-
Perhaps it's due to the inconsistency in the bullets or plating?
-
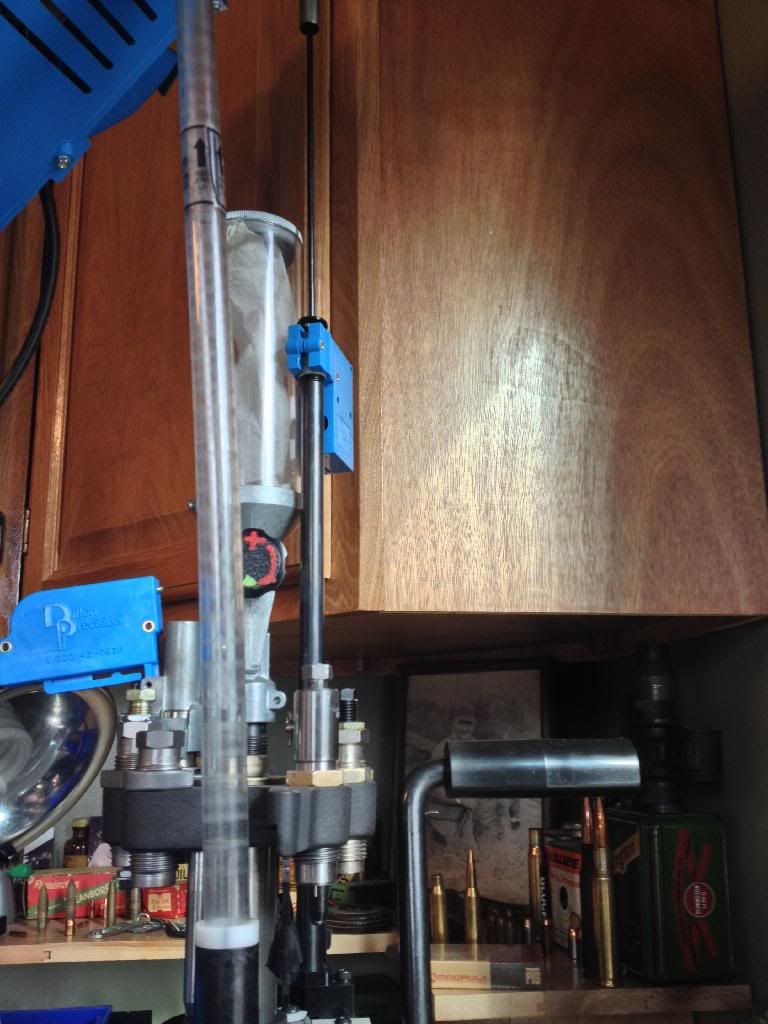
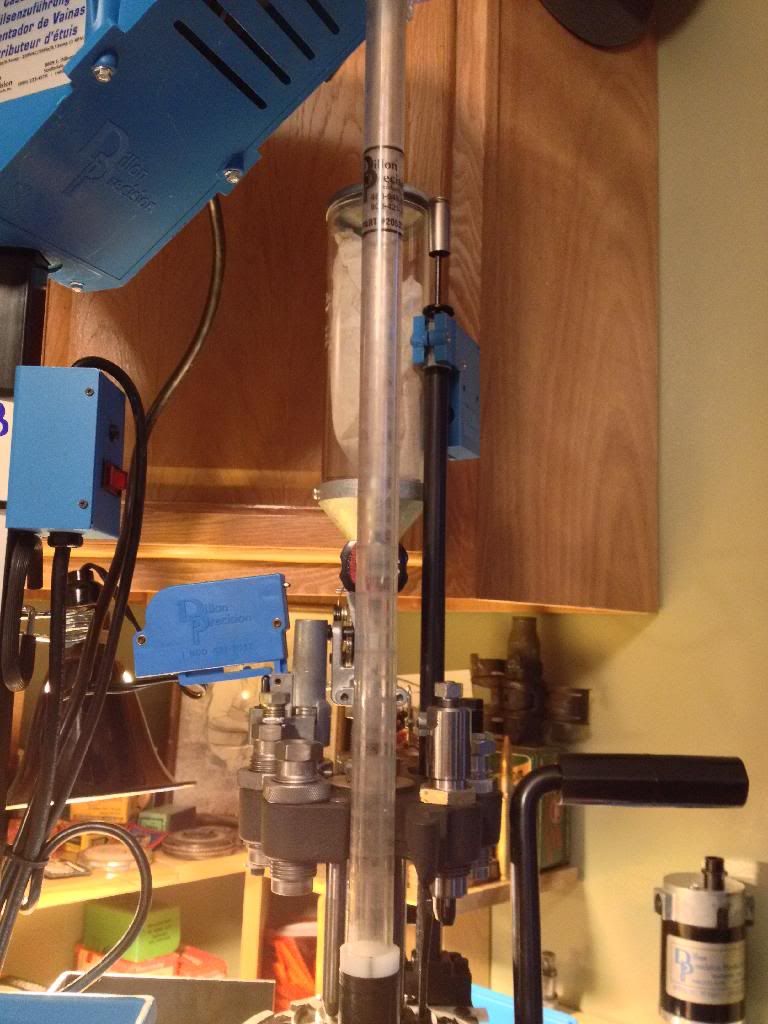
When I bring the handle down to seat a new primer is when I can see the post moving. It appears to be tourque related and is most noticeable when trying to move the primer slide to the end position. That is where the problem happens. Last night I shimmed this tube up just a little and then retighten the screws. That small amount of added space allowed to unit to function as I expected.
Ok,,, when the new part comes, the proof will be in the puddin.
Would it make a difference if you'd raise the lever arm bracket? Perhaps it's too low and causing the torque?
-
I hope thie new primer assembly is the correct solution for you!
When I wrote above about me not properly reassembling the primer assembly correctly, it was the lever arm bracket (13001) not being set to the correct height. It was somewhat tedious adjusting that, but not too bad. You might want to keep an eye on that while you switch out your old parts with the new.
The other thing I reinstalled incorrectly, which I'm half embarrassed to admit is I reinstalled the primer slide stop (13108) 90 degrees from its proper position.
Hopefully my mistakes can save someone from the lack of frustration I put myself through!
-
I guess I'm a pretty lucky guy. The only time I had problems with my S1050's primer system is when I didn't reassemble the primer system correctly after processing 223 brass.
It wasn't the machine, it was me!
-
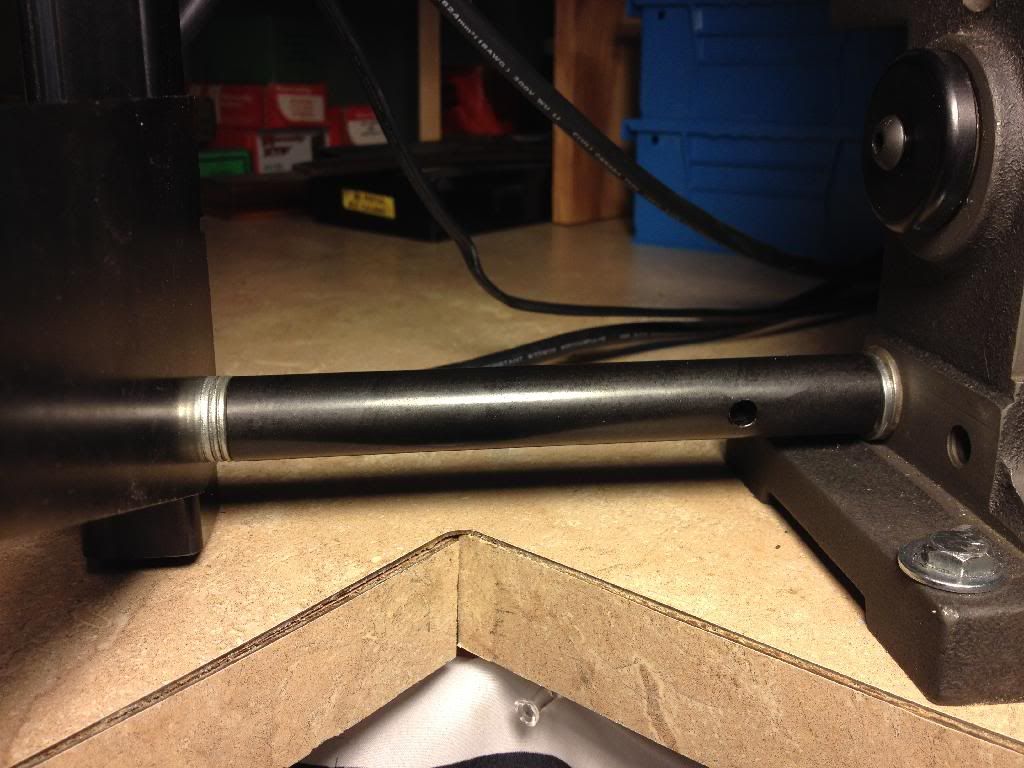
My tube was crooked too.
A few washers fixed things up.
-
I wouldn't cut it. I'd use a file.
-
If your concern is buzzing during setup, just remove the powder check rod. To set up the powder check rod, that should only be 2 or 3 beeps at the most.
I do like the idea of the painters tape too! Simple, cheap and effective!
-
When using Hornady One Shot I just leave the light lube on the finished rounds, might even help with chambering.
You might want to remove the lube from your loaded rounds. When a round is fired it momentarily grips the chamber. With the lube, you could possibly be creating excessive pressure on your pistols breach face.
-
I found no need for a thrust bearing. The free and effective method has work for me. Properly adjust the index block to pull the shell plate to the detent ball instead of the detent ball pulling the shell plate into final position. Dillon make a alignment tool for this that goes on the primer punch. Clip a coil off the detent ball spring, tighten the shell plate bolt as tight as you can and still have no drag, one drop of oil under the bolt head and tighten the set screw.
Sent painfully from my iPhone 5 using Tapatalk
You said a lot there. I found the same to be absolutely true.
Another crucial adjustment that I took for granted was the camming pin for the case insert. If that is adjusted so the case insertion is timed correctly, it does a lot to make the 650 run smoothly.
-
I would just suggest 1 thing (Based on your need for 9mm + 45ACP), Order the machine in 9mm and then order a complete LARGE primer system. It will save you alot of grief. A caliber swap then only requires the removal/replacement of 2 bolts (For the primer system), and the removal/replacement of the primer punch.
Life is really happy

This, or start using small primer 45 ACP brass since it seems a lot of people dislike it. Plus you'll only have to stock up on small pistol primers!

-
I did this to my 650 ----0----- and it has run for about eight years now and I don't know how many thousands of rounds.
What I plan to do to it in the future----nuttin,nada,let it alone..pull the handle
I'm pretty much with you EEH. The only thing I've done to my 650s is hooked tubing up so the primers will go into a receptacle under my bench and clipped the index ball spring.
The only time I had problems with my 650 was when I put the highly touted bearing kit on the shell plate. It caused more problems with ejection than it was worth. I discovered that the proper adjustment of the camming pin is far more crucial than I thought it was and lubing the underside of the shell plate bolt alleviated all my powder spilling problems.
-
Hammer1,
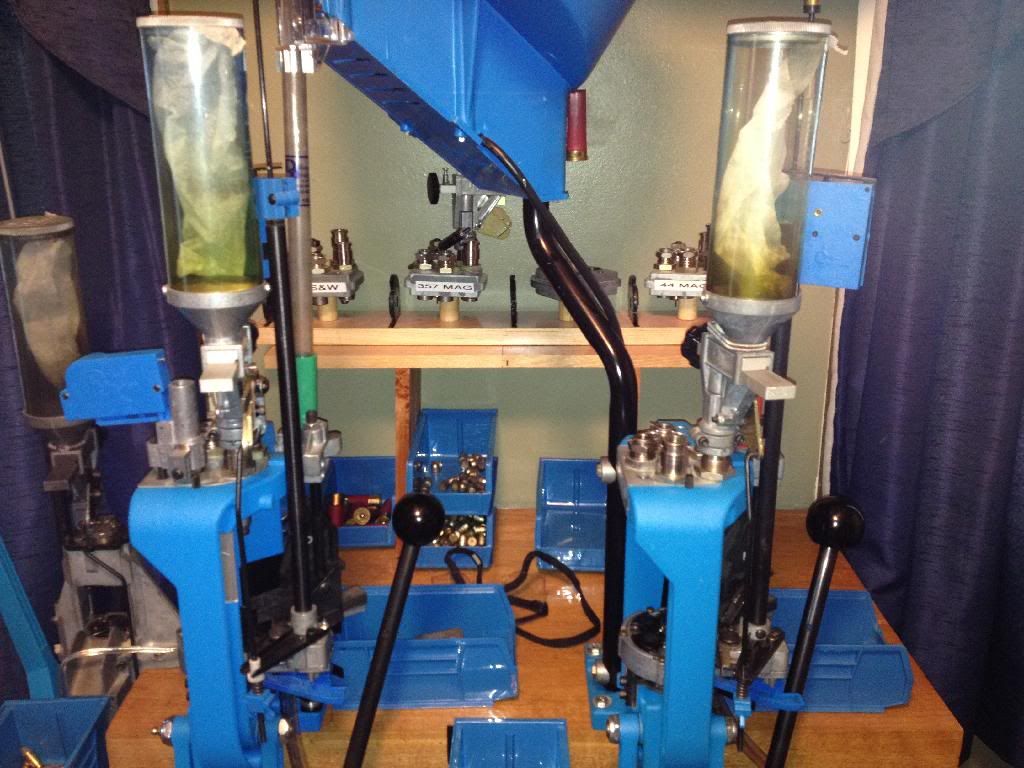
I have my 2 650s set up like this for two reasons: So I could use the same case feeder for two machines, and due to the cupboard height above my machines, the only way I could remove the case feeder to switch to the other machine it is to actually remove the pipe that the case feeder is attached to. With my machines mounted like this, all I have to do is swing the case feeder around to the second machine.
Although this may look crowded, it's actually very comfortable to reload from, since only one machine is used at a time.
The distance between the machines is 10".
I noted you related your bench top is 2" thick. One thing you may have to do where you have 650s mounted is to use a router and remove some wood on the underside of the bench in the area of the press handle linkage, as the linkage for the handle will probably hit the bench top's bottom before you complete your stroke. My bench top is 2 3/4" thick and I had to remove close to an inch.
With my 1050 that I have mounted on another bench, I did not have handle clearance problems with the machine mounted flush to the edge of the bench.
I hope this gives you some food for thought.
-
It's great having 2 650s! I had the one and I picked up the other one used for $250 with 3 tool heads. Incidentally, it was the first 650 I ever reloaded on back in the early 90s. The guy that had it, didn't like it ( I think there was too much going on at once for him) and he never used it. It sat for years in a box in his basement. I doubt it reloaded 200 rounds before I got it.
I mounded them so I could use one case feeder for both and it works out pretty good!
What are those bags in your powder tubes?
They are dryer sheets to help help with static ( in theory anyway).
-
It's great having 2 650s! I had the one and I picked up the other one used for $250 with 3 tool heads. Incidentally, it was the first 650 I ever reloaded on back in the early 90s. The guy that had it, didn't like it ( I think there was too much going on at once for him) and he never used it. It sat for years in a box in his basement. I doubt it reloaded 200 rounds before I got it.
I mounded them so I could use one case feeder for both and it works out pretty good!
-
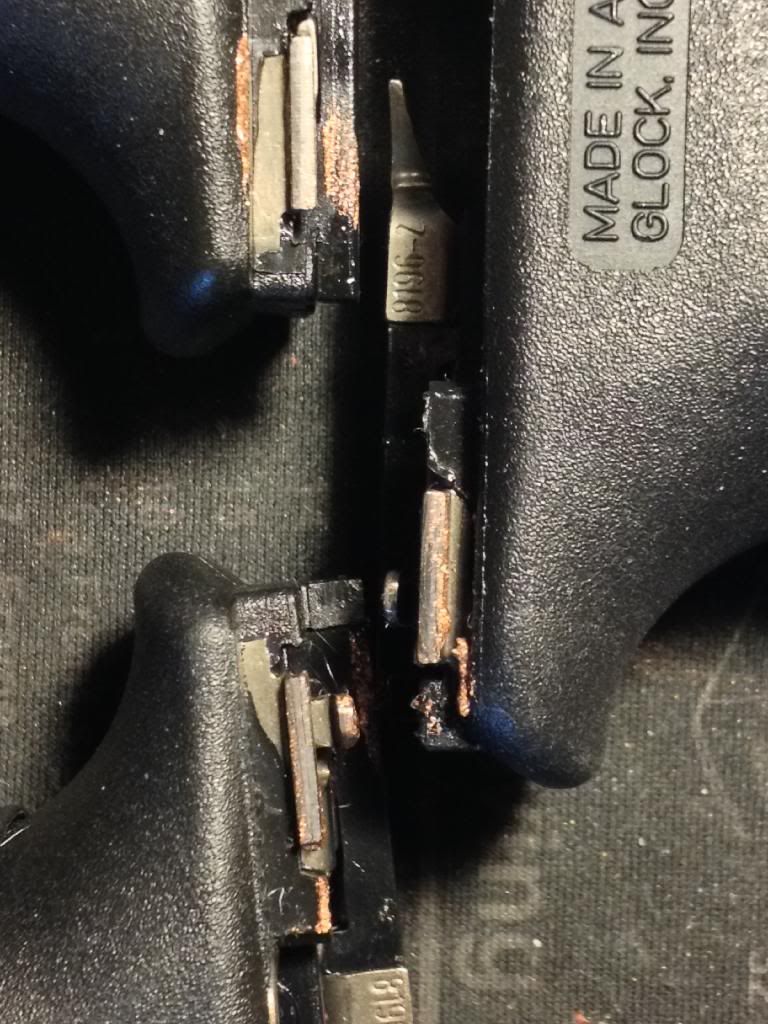
A lot of good advice above regarding SWCs. I also have had this problem in a Gen3 30. I believe one of the causes of this are the rear frame rails are set too low in frame. I have two 21s, a gen 3 and gen 4 that feed every style of bullet I put in them. Compare the height of their rear frame rails (guns on the left of the picture) to the 30 which is on the right of the picture.
-
I empty them. Why not? Disconnect the powder measure rod, pull 2 pins, remove the tool head and dump the measure back in the can, run the powder bar back and forth a few times and you're done.
OR
Just remove the powder measure rod, back out the two bolts that secure the measure to the powder die and dump back in the can.
I don't store powder in the measure. When the measure is empty, I put a dryer sheet in it to help with possible static.
-
Nealio, as Razorfish said, make sure the station 1 locator has grease under it. Also, check your camming pin adjustment. If the case enters the shell plate too soon, sometimes it will cause less than desirable alignment in station one. Operate your machine while concentrating on how the case is inserted into station 1 and how the camming pin position / adjustment effects it's location in station 1. I know it's something I took for granted and it makes a difference! It also smooths out the shell plate travel once properly adjusted!
-
My LGS had some RE15 recently (1 lb containers), they want $32 a pound though so that is pretty pricey compared to 8208 at $19 per pound (8 pound jug).
That's a good price for 8208! I paid $25 locally. It just went up from $20.
On the other hand, that's a ridiculous price for RE15!
-
The very tiny quantity of returned equipment we receive is allocated to help customers who have lost equipment due to fire, flood or other natural disaster, where their insurance does not cover it.
we never have enough to fill this demand. This has nothing to do with warranty, just trying to help people out.
This is very cool and the reason why when I need something for reloading and Dillon makes it, I'll get it from Dillon!
-
Since I can't find any RE15 locally, 8208XBR has become my new heavy 223 powder. I have found no problems with at all with the metering of 8208. As a matter of a fact, it's starting to become my new favorite 223 powder!
-
I'm curious, do you have the needle bearing mod on your reloader? For the short time I used the bearing, it seemed I'd have occasional alignment issues and ejection issues.
I took the bearing off when I noticed that most of the powder sloshing motion from the shell plate is due to the camming pin not being properly adjusted - as in the case is being inserted too soon or too late. Did you ever notice how the shell plate does not jerk when there's no case being inserted? This is why. The other thing that causes the jerking is the index ball hitting the bottom of the shell plate. The common fix for this is clipping the spring.
For me the needle bearing caused more problems than it solved. The bearing does a good job of covering up my failure for properly having the machine timed, but still caused problems. With grease on the underside of the bolt head, properly adjusted shell plate tension and properly adjusted camming pin, the bearing is not needed.
-
Although it looks more like damage from not being aligned in station 2, check to make sure the case is being fully inserted in station 1. If the case is not fully inserted OR if the case is slightly pulled out when the case insert slide goes back due to old case lube or something else being on the slide, this could cause decapping pin can be catching on the case mouth and denting the mouth as it re aligns the case in the shell plate to continue into the sizing die.


XL 650 Shellplate Bearing Kit
in Dillon Precision Reloading Equipment
Posted · Edited by Henny
I found that having the machine timed properly helps more than the bearing kit. As a matter of a fact, I don't use the bearing kit at all. It was a waste of my money.
Check these things:
Ensure when the case is getting inserted into station 1, it's not going in too early and forcing the shell plate to the detent. This plays havoc with smooth movement of the shell plate. I know I had overlooked it. This is adjusted with the camming pin (Part # 13371 on page 50 of the manual)
Put grease on the underside of the shellplate bolt.
I did clip the detent spring. However, I don't remember if it was 1/2 of a coil or a coil and a half! Go slow with the clippers!
Concentrate on operating the handle smoothly.
Have your shell plate properly adjusted. Too loose and your COL will go out the door. Too tight, you risk breaking the index ring. It's a very small adjustment between too tight and too loose!