


Steyrarms
-
Posts
24 -
Joined
-
Last visited
Content Type
Forums
Profiles
Events
Store
Posts posted by Steyrarms
-
-
Well it sounds much much better now. I think of you spend some hours you will eventually find out what it is. Once thats solved, she will run like queen of AP press.
Did you check the top and bottom distances to?
ATB
Sascha
-
Great stuff, did you got some help from M7 or did you found it out by yourself?
I have not got an answer on my rather angry post on the M7comunity regarding the primer collator, since I now know what they have changed, it’s much easier for me to argue with them.
-
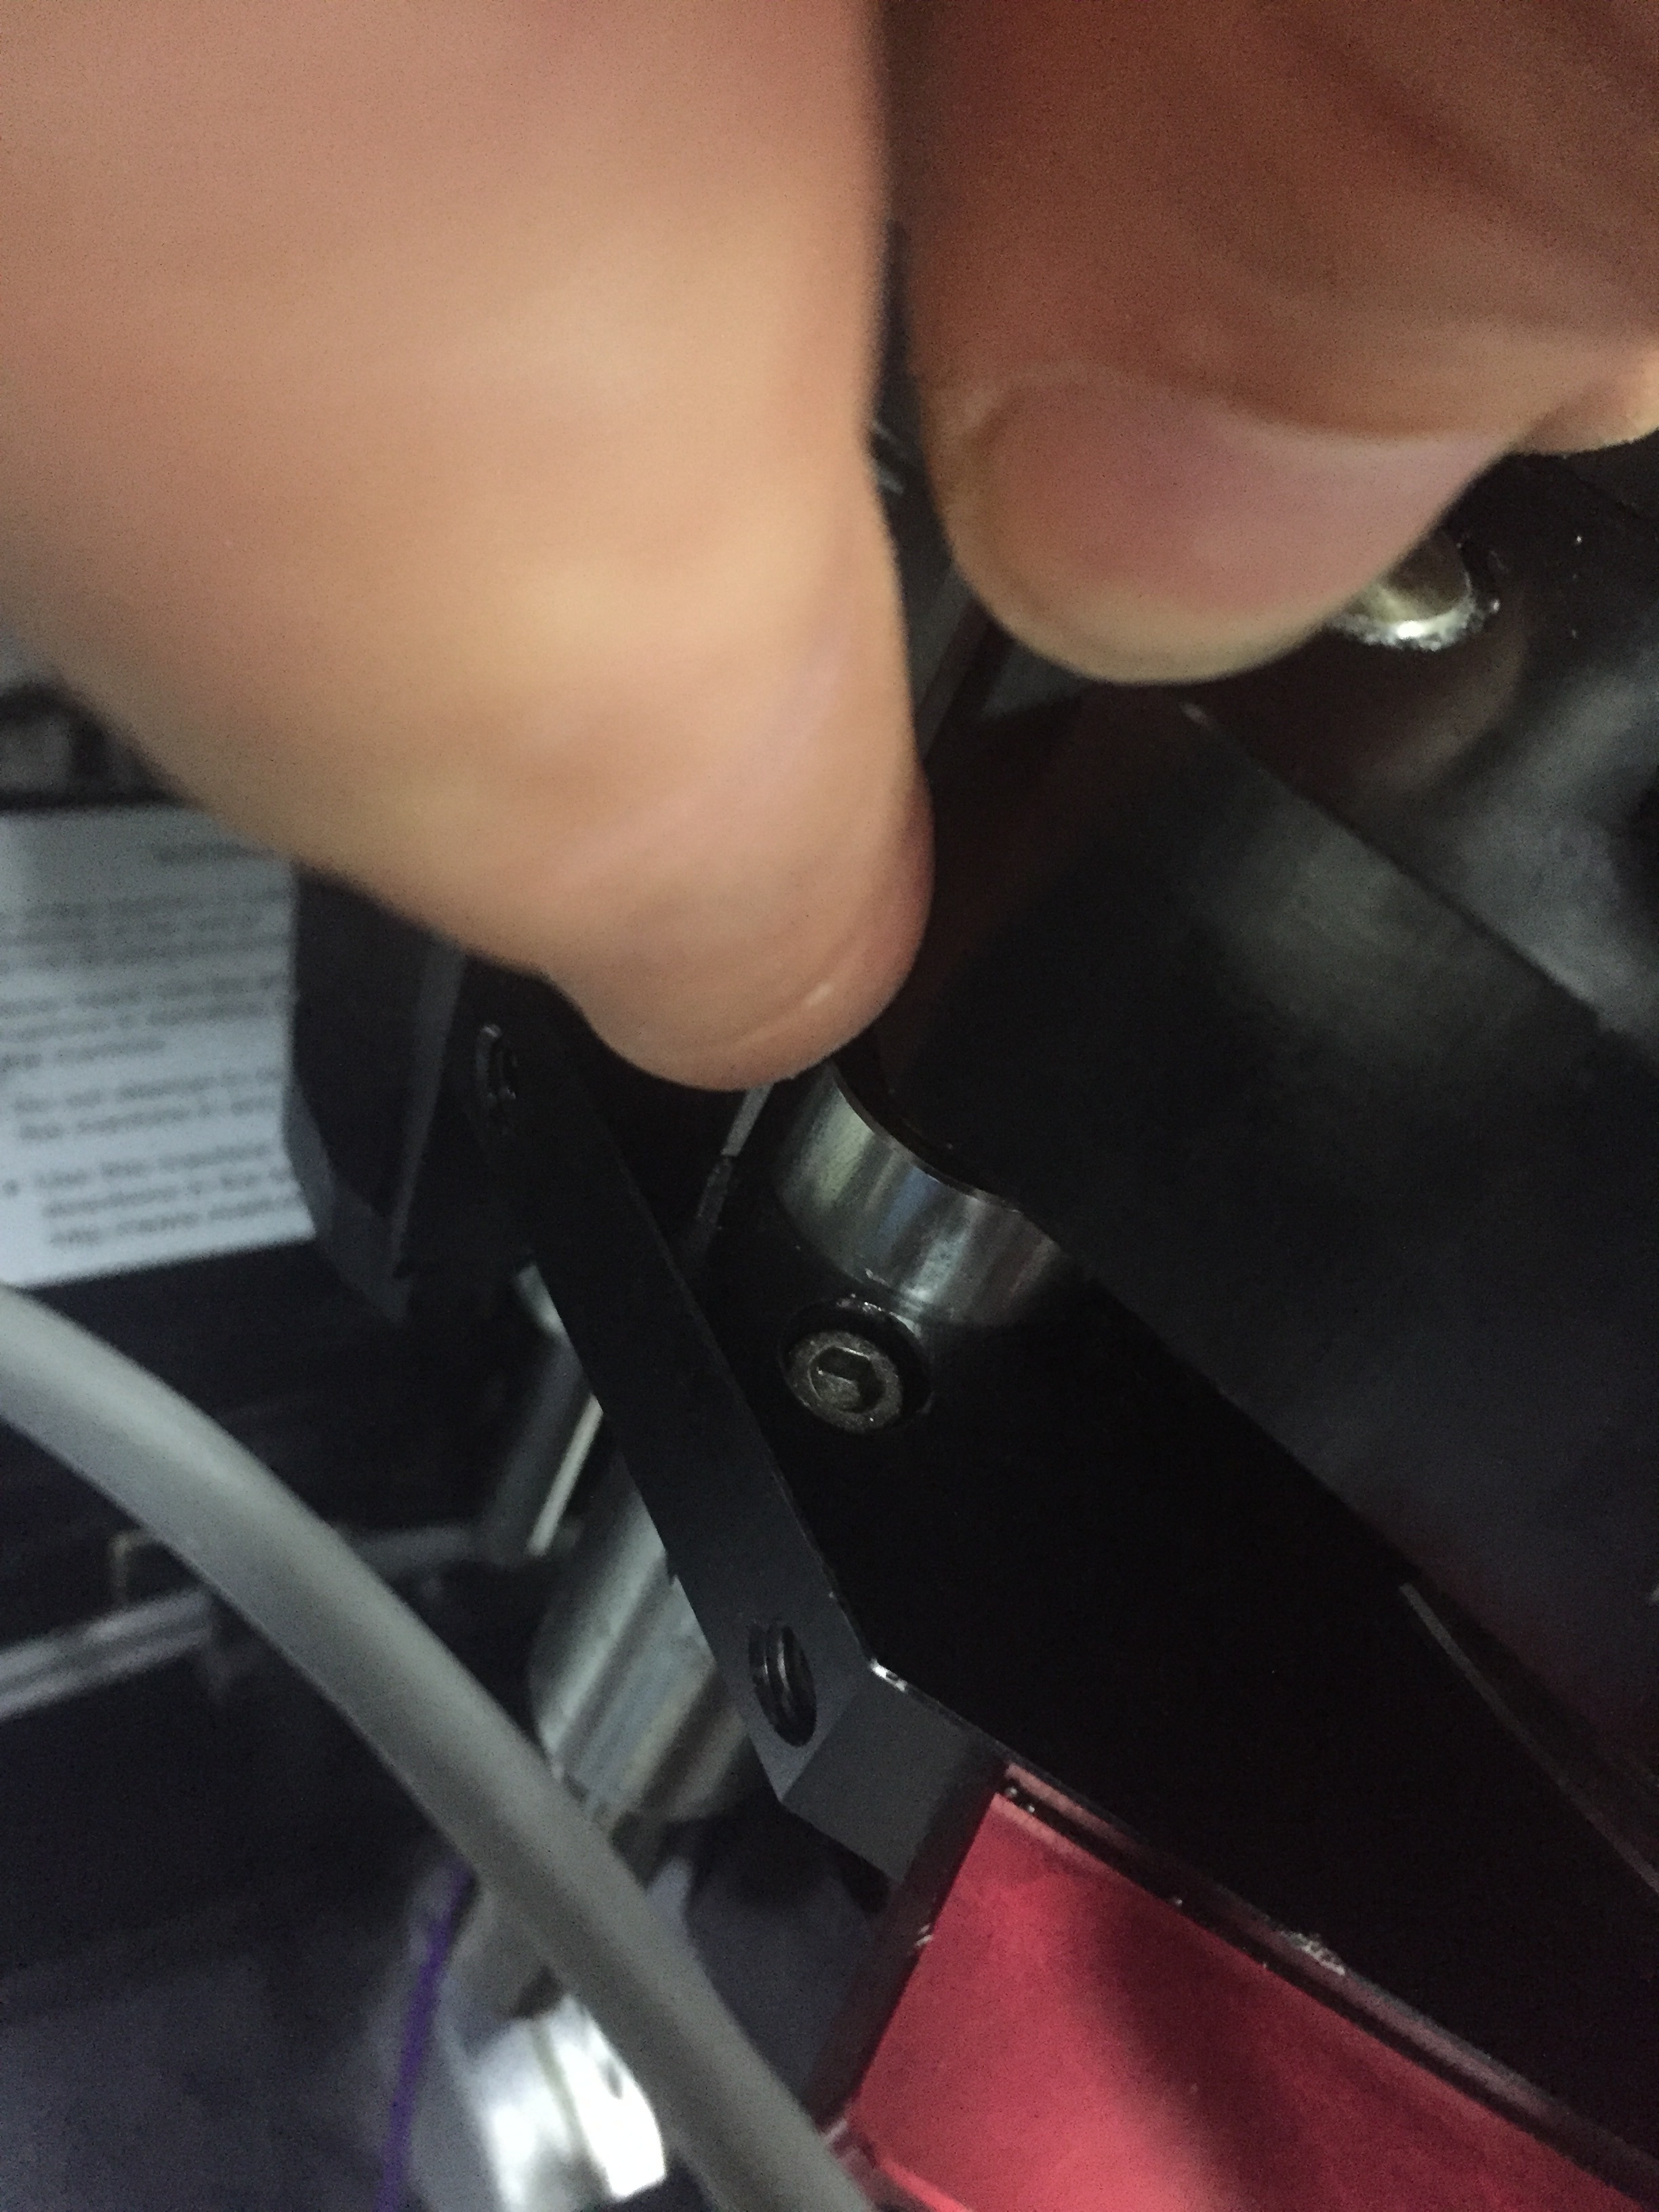
So as promissed here some measurements.
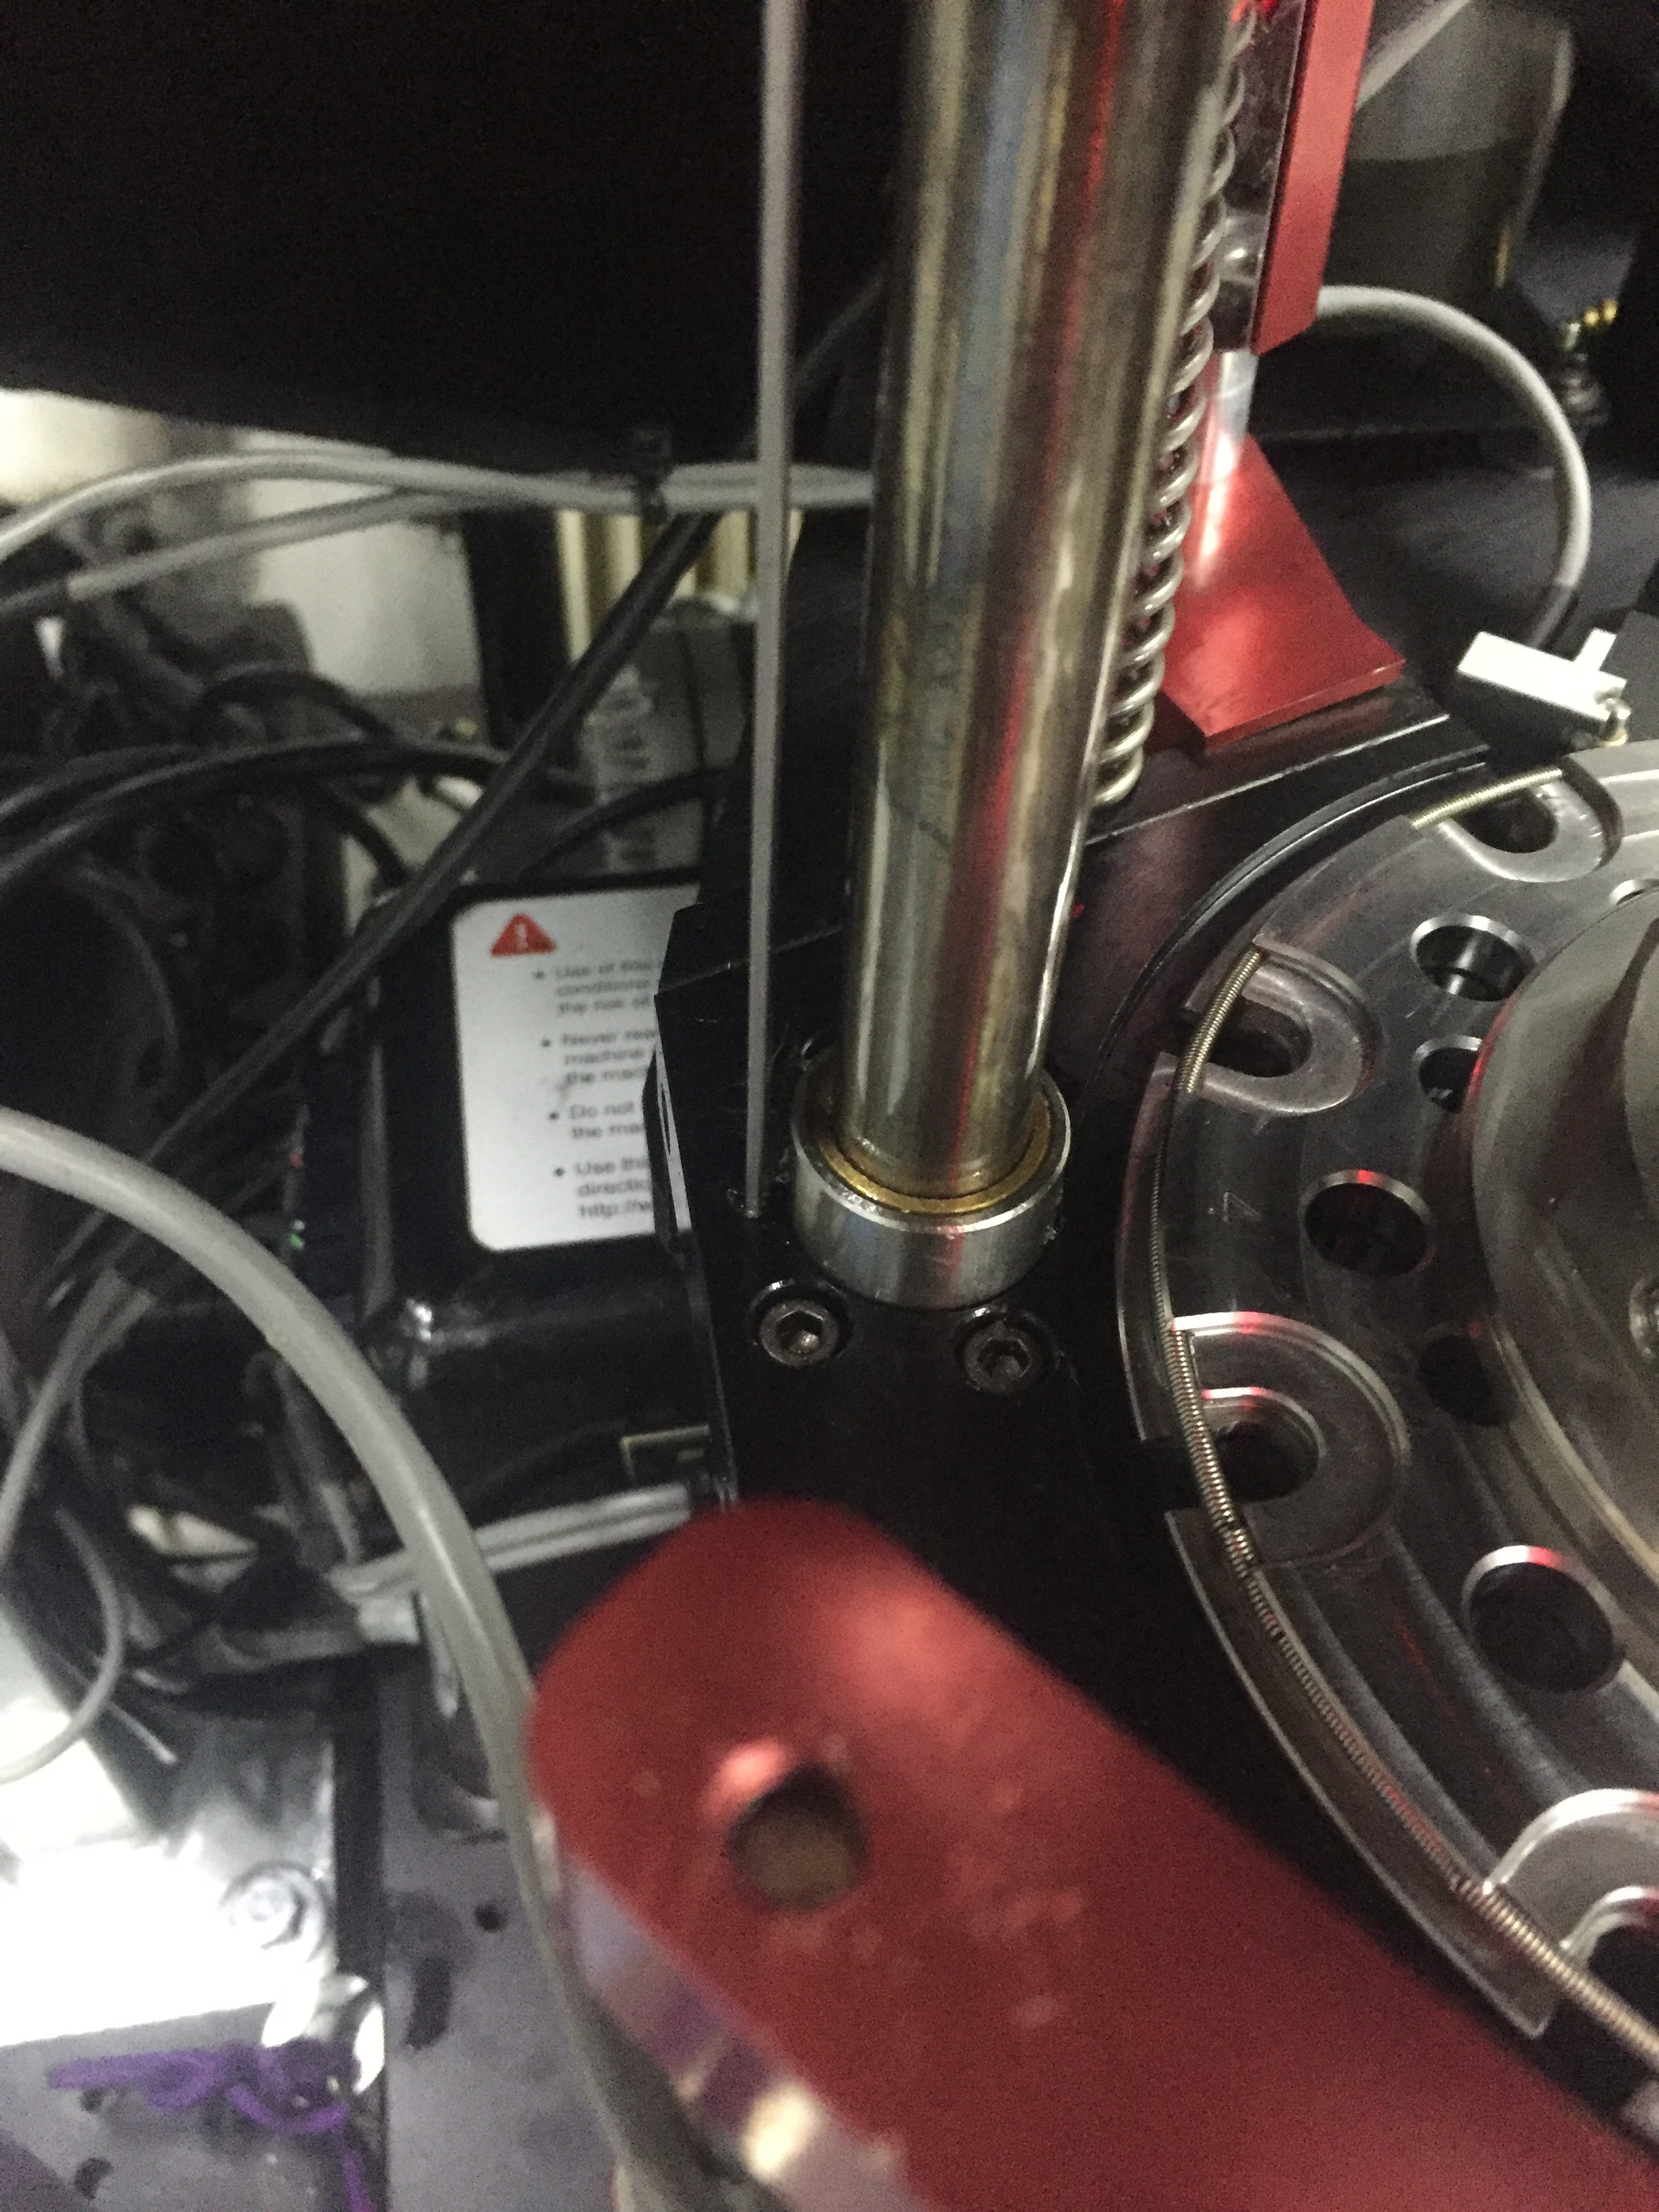
Tool head at this Point is 0.999" thick
When at the Bottom, from the top of the tool head to the Surface of the press it is 1.7370"

This how and where i measure, ensure you are going perfectly vertical, otherwise it would mess up the results
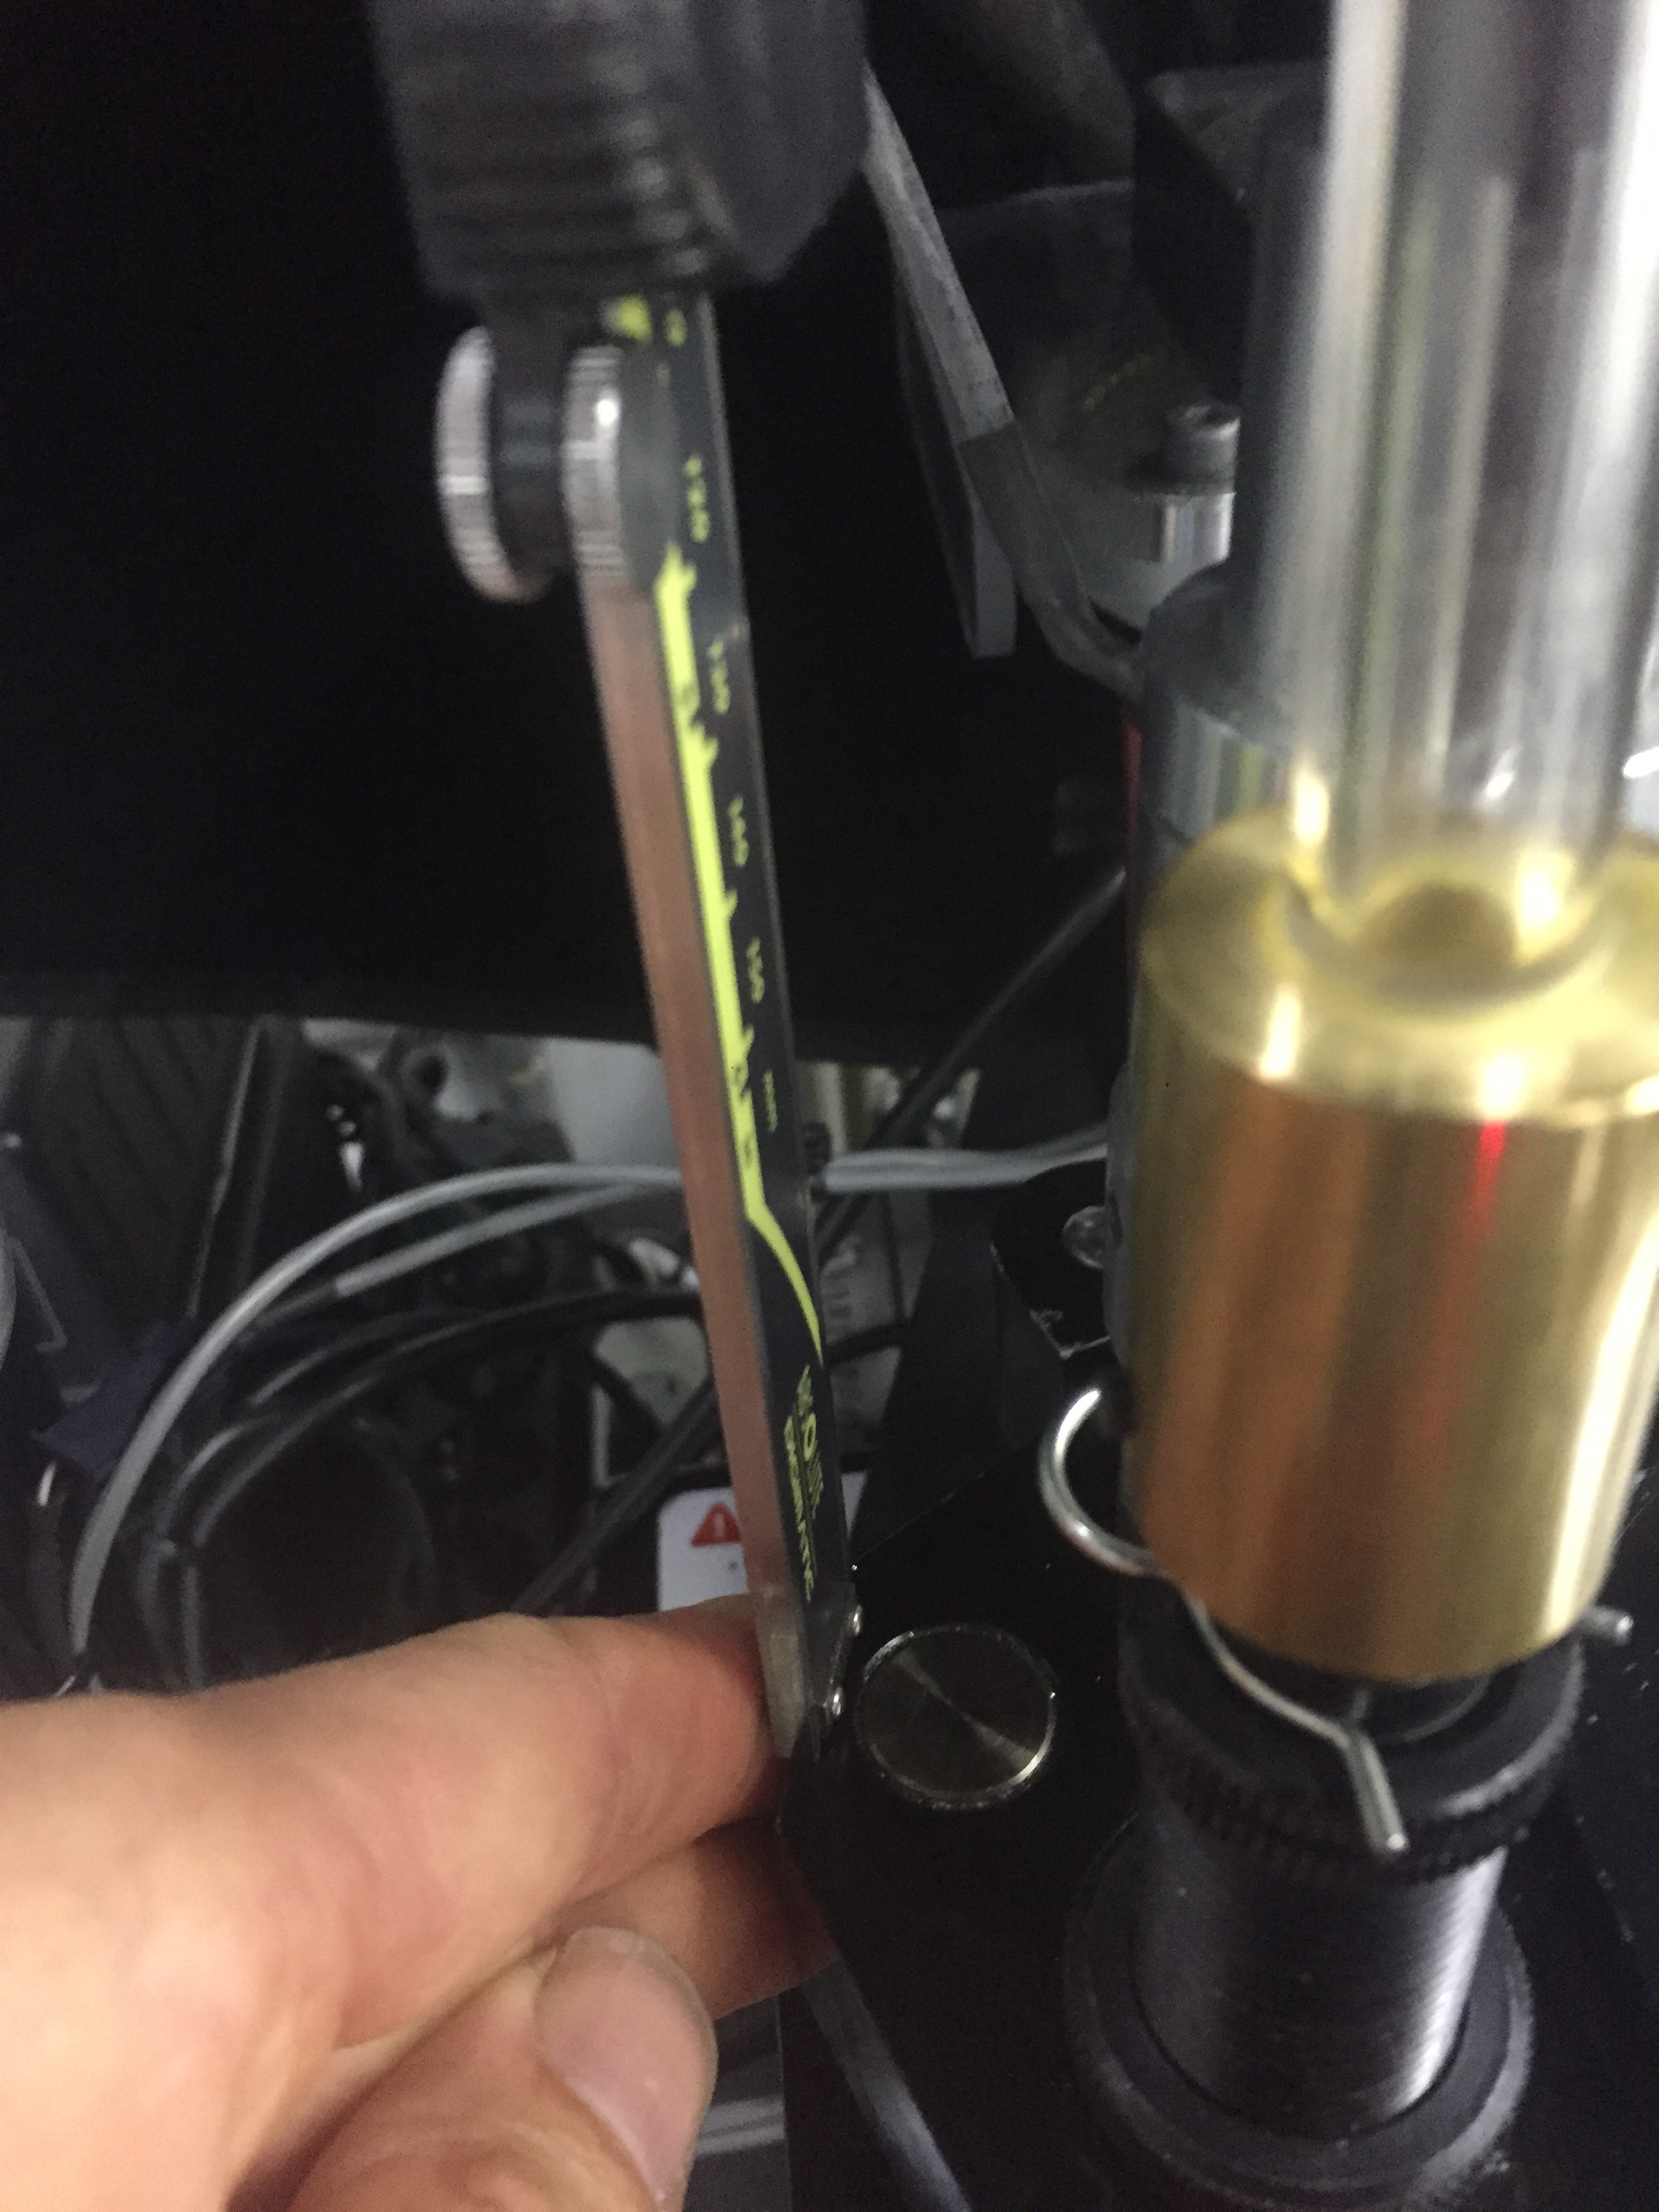
When the ram is on the top, i got 5.2265"
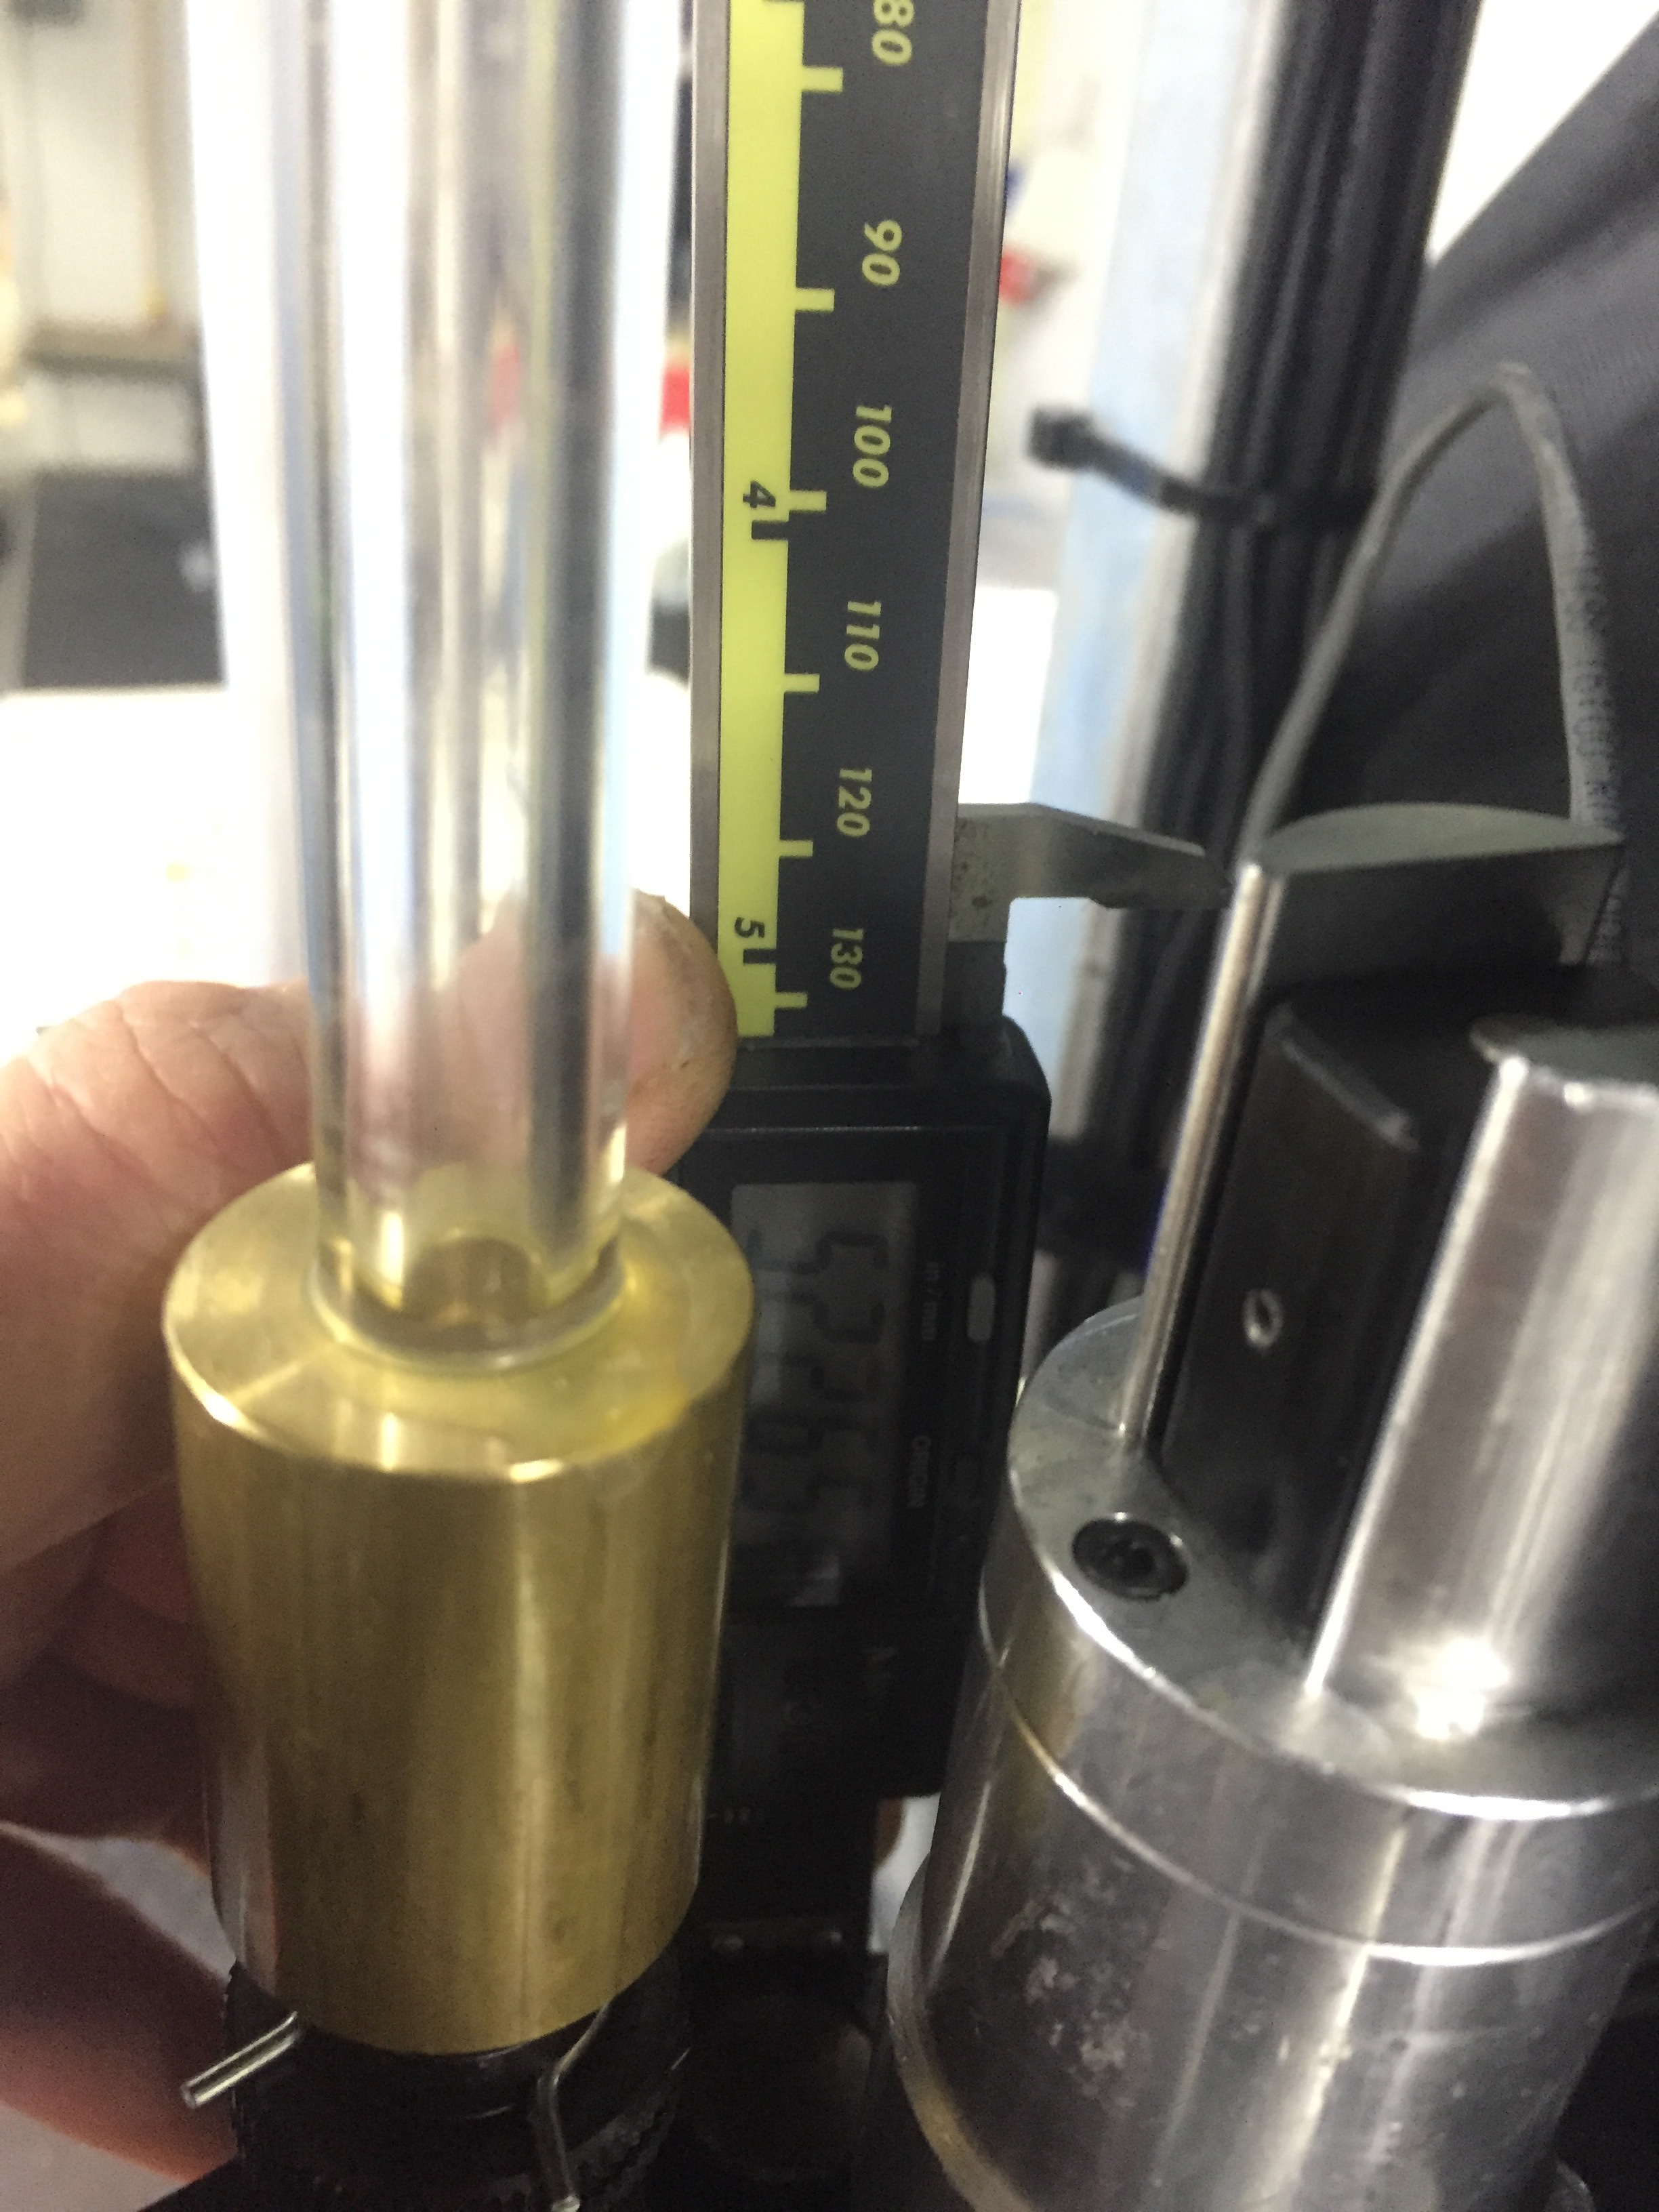
Same measurement Point as before

-
Ok, I watched the Video a few mor times, do yourself a favour and record in slow motion as steady as you can, one time with the crank mechanissm and the rear guid rod in the picture and one time with the index mechanism and the crank mechanism in the picture.
I was watching the last video about 10 times, to much movement from you in it, but you can clearly see a few times, the clonk does not happen at top position but on its way to it.
It is very hard to tell, if it is happening when the rear guide rod exits the bushing, what would indicate a misalignment. Our if it is the Indexing that causes the whole issue. If it is the indexing, you really need to remove the whole assembly with the tire on it. I had to do this once at the very beginning. Jammed a primer, thought brute force will help and endet up bending the arm.... was a pain in the butt, lesson learned
")
In the M7 comunity there are all the good drawings you will need
-
Even after more than 50k strokes, i do not hav such bad wear marks from my upper Stopping pin.
Also check the grub screws, they lock pretty far out, mine are flush.
As a very wild guess, since I don‘t know exactly how the plc is programmed, it seams to me, that you have just a bit to less downstroke during calibration or the set screw for indexing and upstroke is set far in.
As a next step, I will calibrate my press tomorrow and than run it to bottom with the button. Once the toolhead is bottomed out, i will measure the disdance from shell plate toolhead. I will make a bunch of pictures, so you can measure at the exact same spot. After I will go back to upper position an measure again.
As a result we will have a movement window. That should be more or less the same on every press. If we see some significant difference, next step will be to fix that.
BTW a bit of flexing of the ram is normal, in the downstroke it is guided, but in the upstroke almost to the end of the stroke, there is no more guide rod, so the ram can tilt. If the ram hits with full power into the stop screw, than the ram tilts even more.
But all that is just a wild guess, it could be something completely different as well.
-
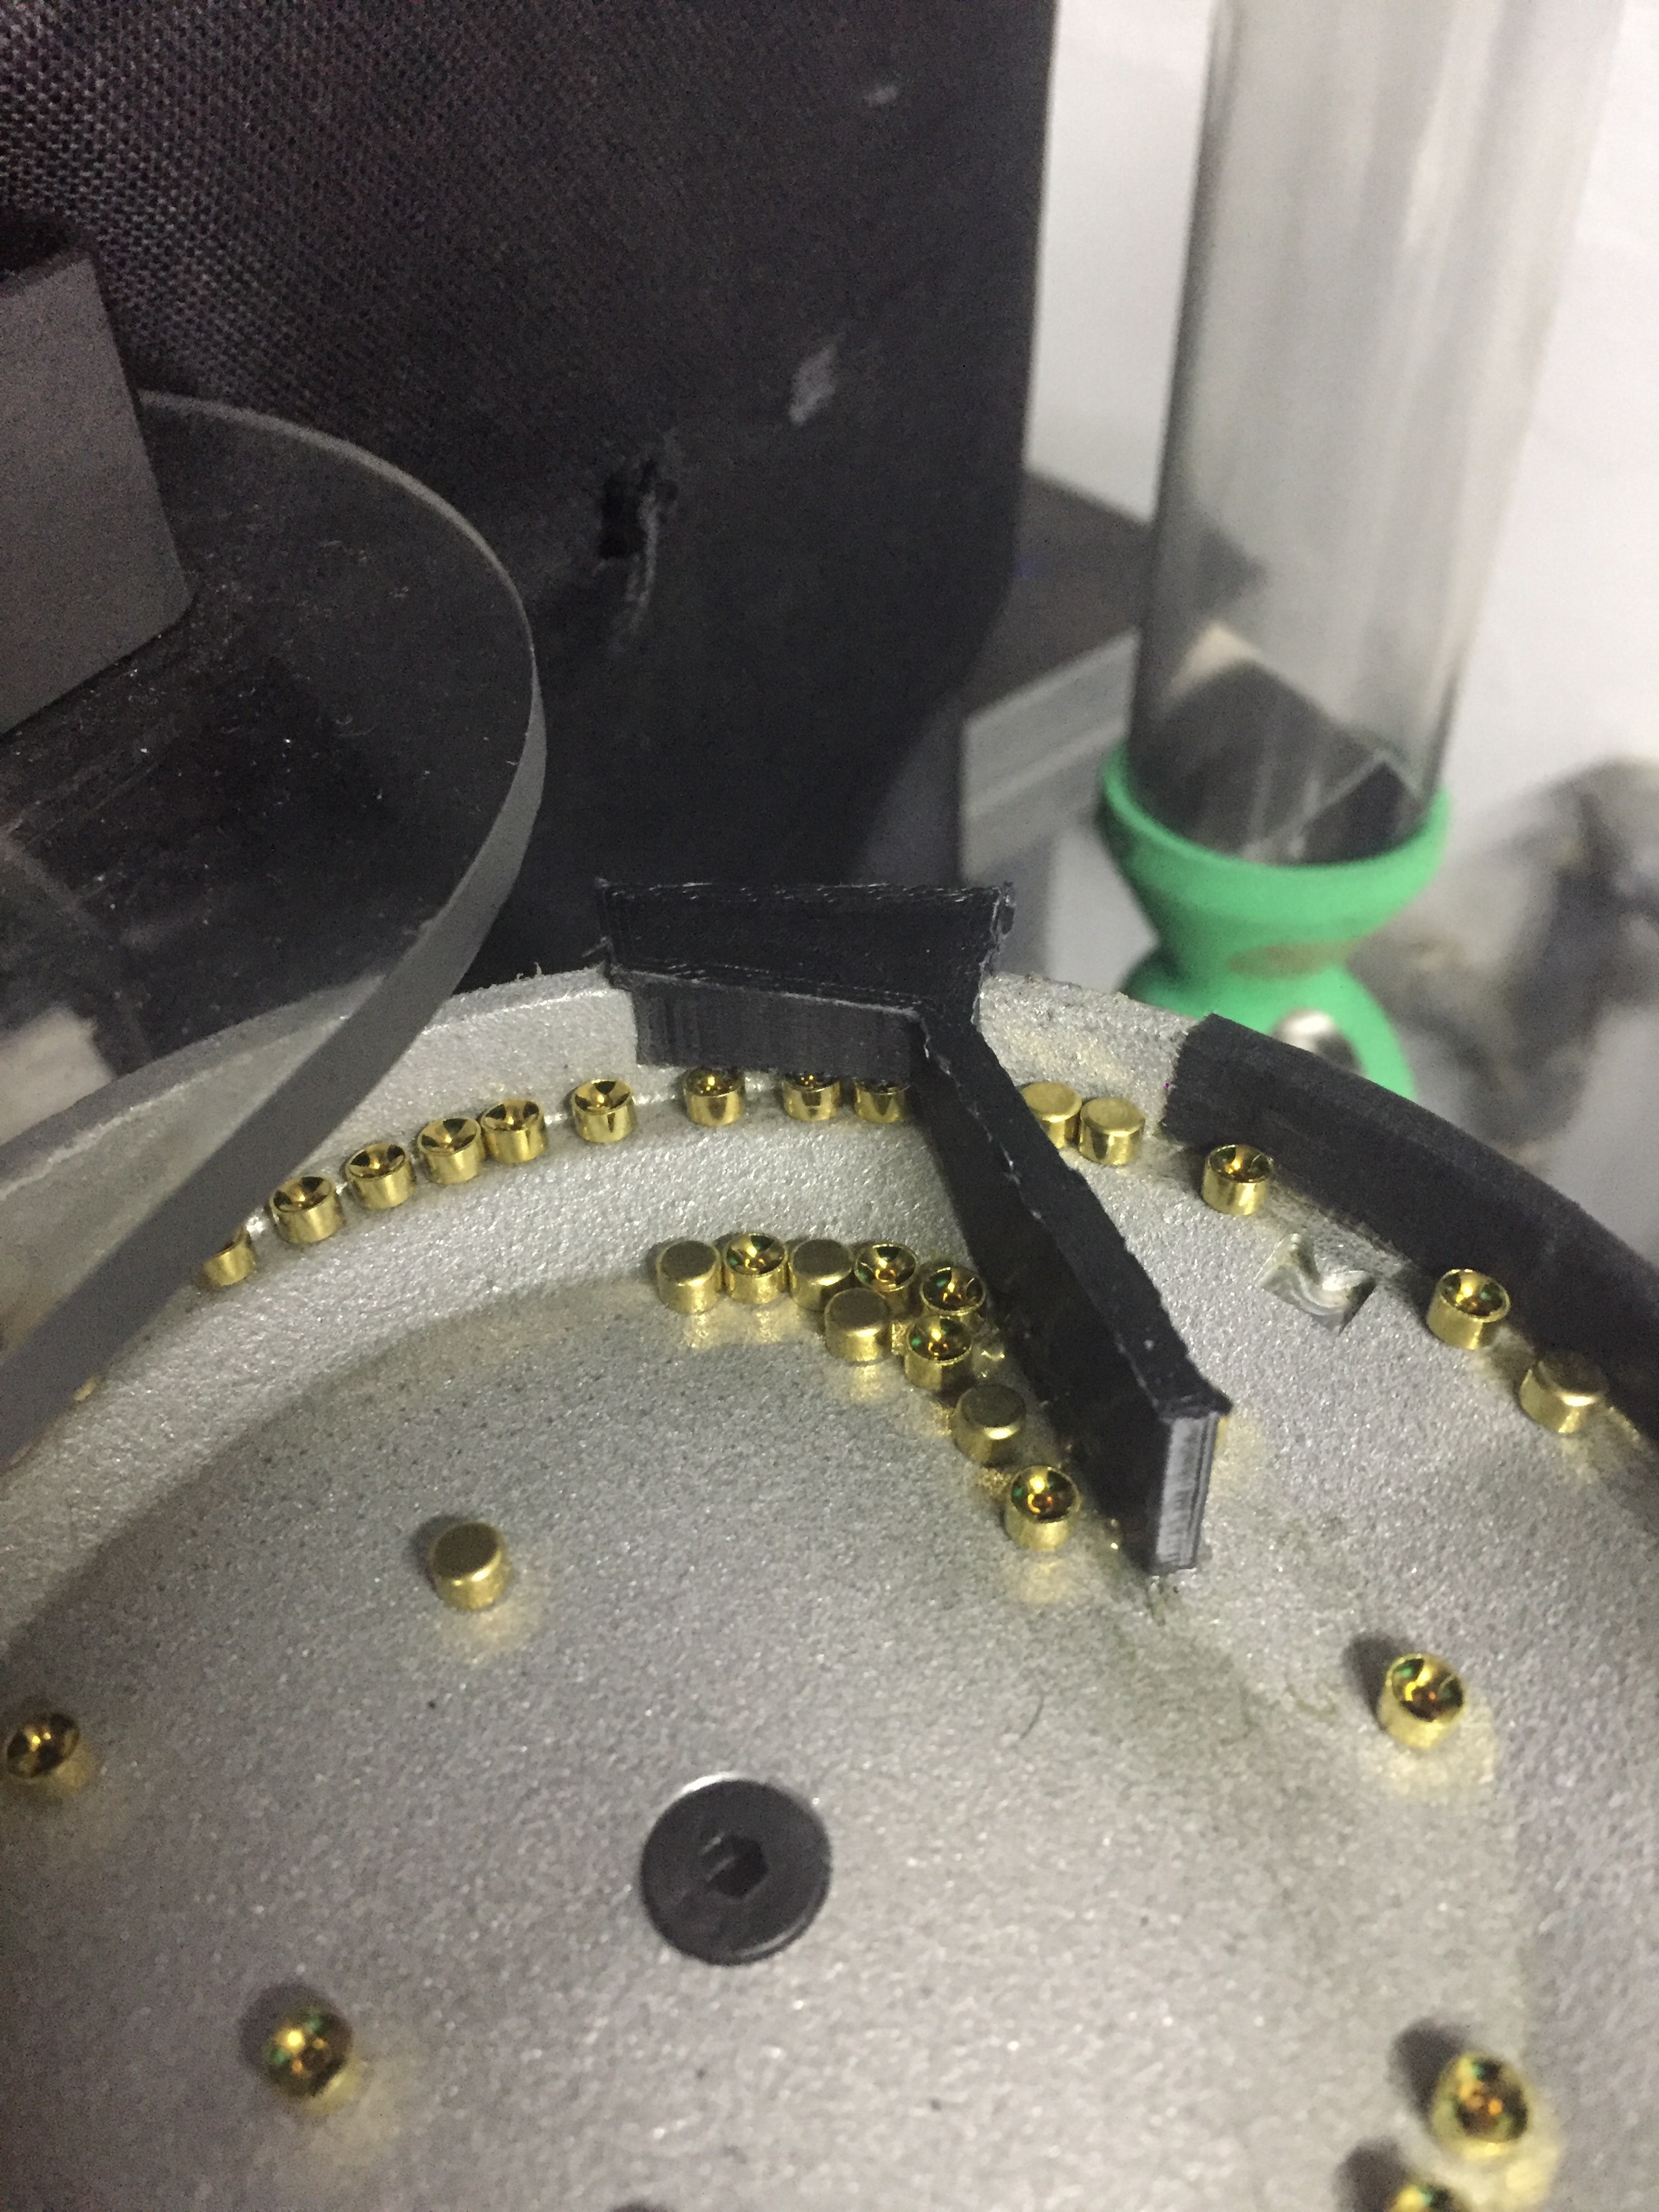
More important than the new position of the wiper, is the way the cut outs are milled, you can spot the difference straight away, this looks a lot more like a Small primer bowl than the old one. Now I just need to get hold of somebody to ship it to me in Austria
-
1 hour ago, Thetimb said:
Would anyone with an evo + on board primer collator mind posting a video of the press running with no cases going through the shell plate?
Here you go, I was running on different speeds ro show you how it should be.
I have 2-3 ideas what it could be, first the indexing, to check that, you need to revove the Primer disk attachement (the whole thing!) Then check if indexing is freely moving.
Next would be the Guid rod of the crank mechanism itself. You got that nice big Clear plastic window in the front to se into the core, and in the back you got another one to access the guide rod. This rod needs oil every now and than, but even more important it need to be aligned perfectly. There is a how to manual on the M7 evolution User group on the M7 forum.
Next big Question, is the crank mechanism tight to the drive shaft.
When you look trough the clear big window, you will see 2 grub screws when the ram is up.... check them, they must be tight
And yet another thing, make sure the set screw for the top stroke limitation is set correctly, you will find that screw next to the small window
I in your case, would give M7 a call, they might have the right idea straight away
-
Holy cow, I will make a video of mine tomorrow.
If my press would run like this, I would return it straight away!
-
Well, you are in troubles.
No your Evo should not shake like that, nighter should it squeak.
I just disassembled, cleaned and greased my press yesterday and she runs smooth like silk.
I did had a bit a jerking once, when I assembled the toolhead with the ram to the top.
So here is your homework:
Remove the toolhead and run it again —> if the jerking is gone... happy days, you need to pay more attention when installing the toolhead.
If the jerking remains, remove the shell plate and run the press again —>
if she still jerks, you know it comes from the main shaft or the connected mechanic.
Also remove the primer disc since dirt beneath can cause troubles too.
If all that does not help, it comes from the main pin mechanic or the tire under the primer disc.
Another important thing, make sure the belt of the drive is really tight, otherwise you will get backlash.
Finally what is wrong with your primer bowl? Seems everyone except me gets a new one
-
 Not sure i still have it. Printed 2, should last forever.
M7 should make them out of aluminium. It does require a bit of filing to get a nice sharp edge on the beginning of the ramp.
You can also see the duct tape where the cut out is, works perfect.
I guess they tried the „one bowl fits small and large primer“ approach... nope it does not!!!
This is something you mainly see with US products. The idea is good, the effort is there but instead of going the extra mile, they (all kind of US manufacturers) go shortcuts. In the end all they got are frustrated customers and a lot of upgrades.
-
9 hours ago, Thetimb said:
where did they have you sand down on the bowl? I am setting sideways primers that get stuck under the black arm in the bowl. It stops the rest of the primers from moving on and I constantly have to use an Allen and knock those sideways primers back into the bowl.
I was told they were working on a new primer collator bowl that fixes all these issues but haven’t seen or heard anything.
Well i had the same problem, it was a pain in the bud so i cut some ziptie to a V shape pusher and glued it onto the black arm. Since i hate crappy fixes, a few months later I designed and printed pusher and feeder thingy. Works perfect.
I had upside down primers (S&B SP) from day one, but only 1-2 in a 1000. When I was loading 223 with S&B SR I had up to 8 in a 1000. So I did some research and found that my primer bowl handles Large primers with no issues, but small ones causing trouble. Long story short, some duct tape in the area where up side down primers get sorted out, fixed that problem. Last session 0 up side down primers in a 5k Round session!
-
I have a well running M7 EVO Pro and process batches of 10k 223.
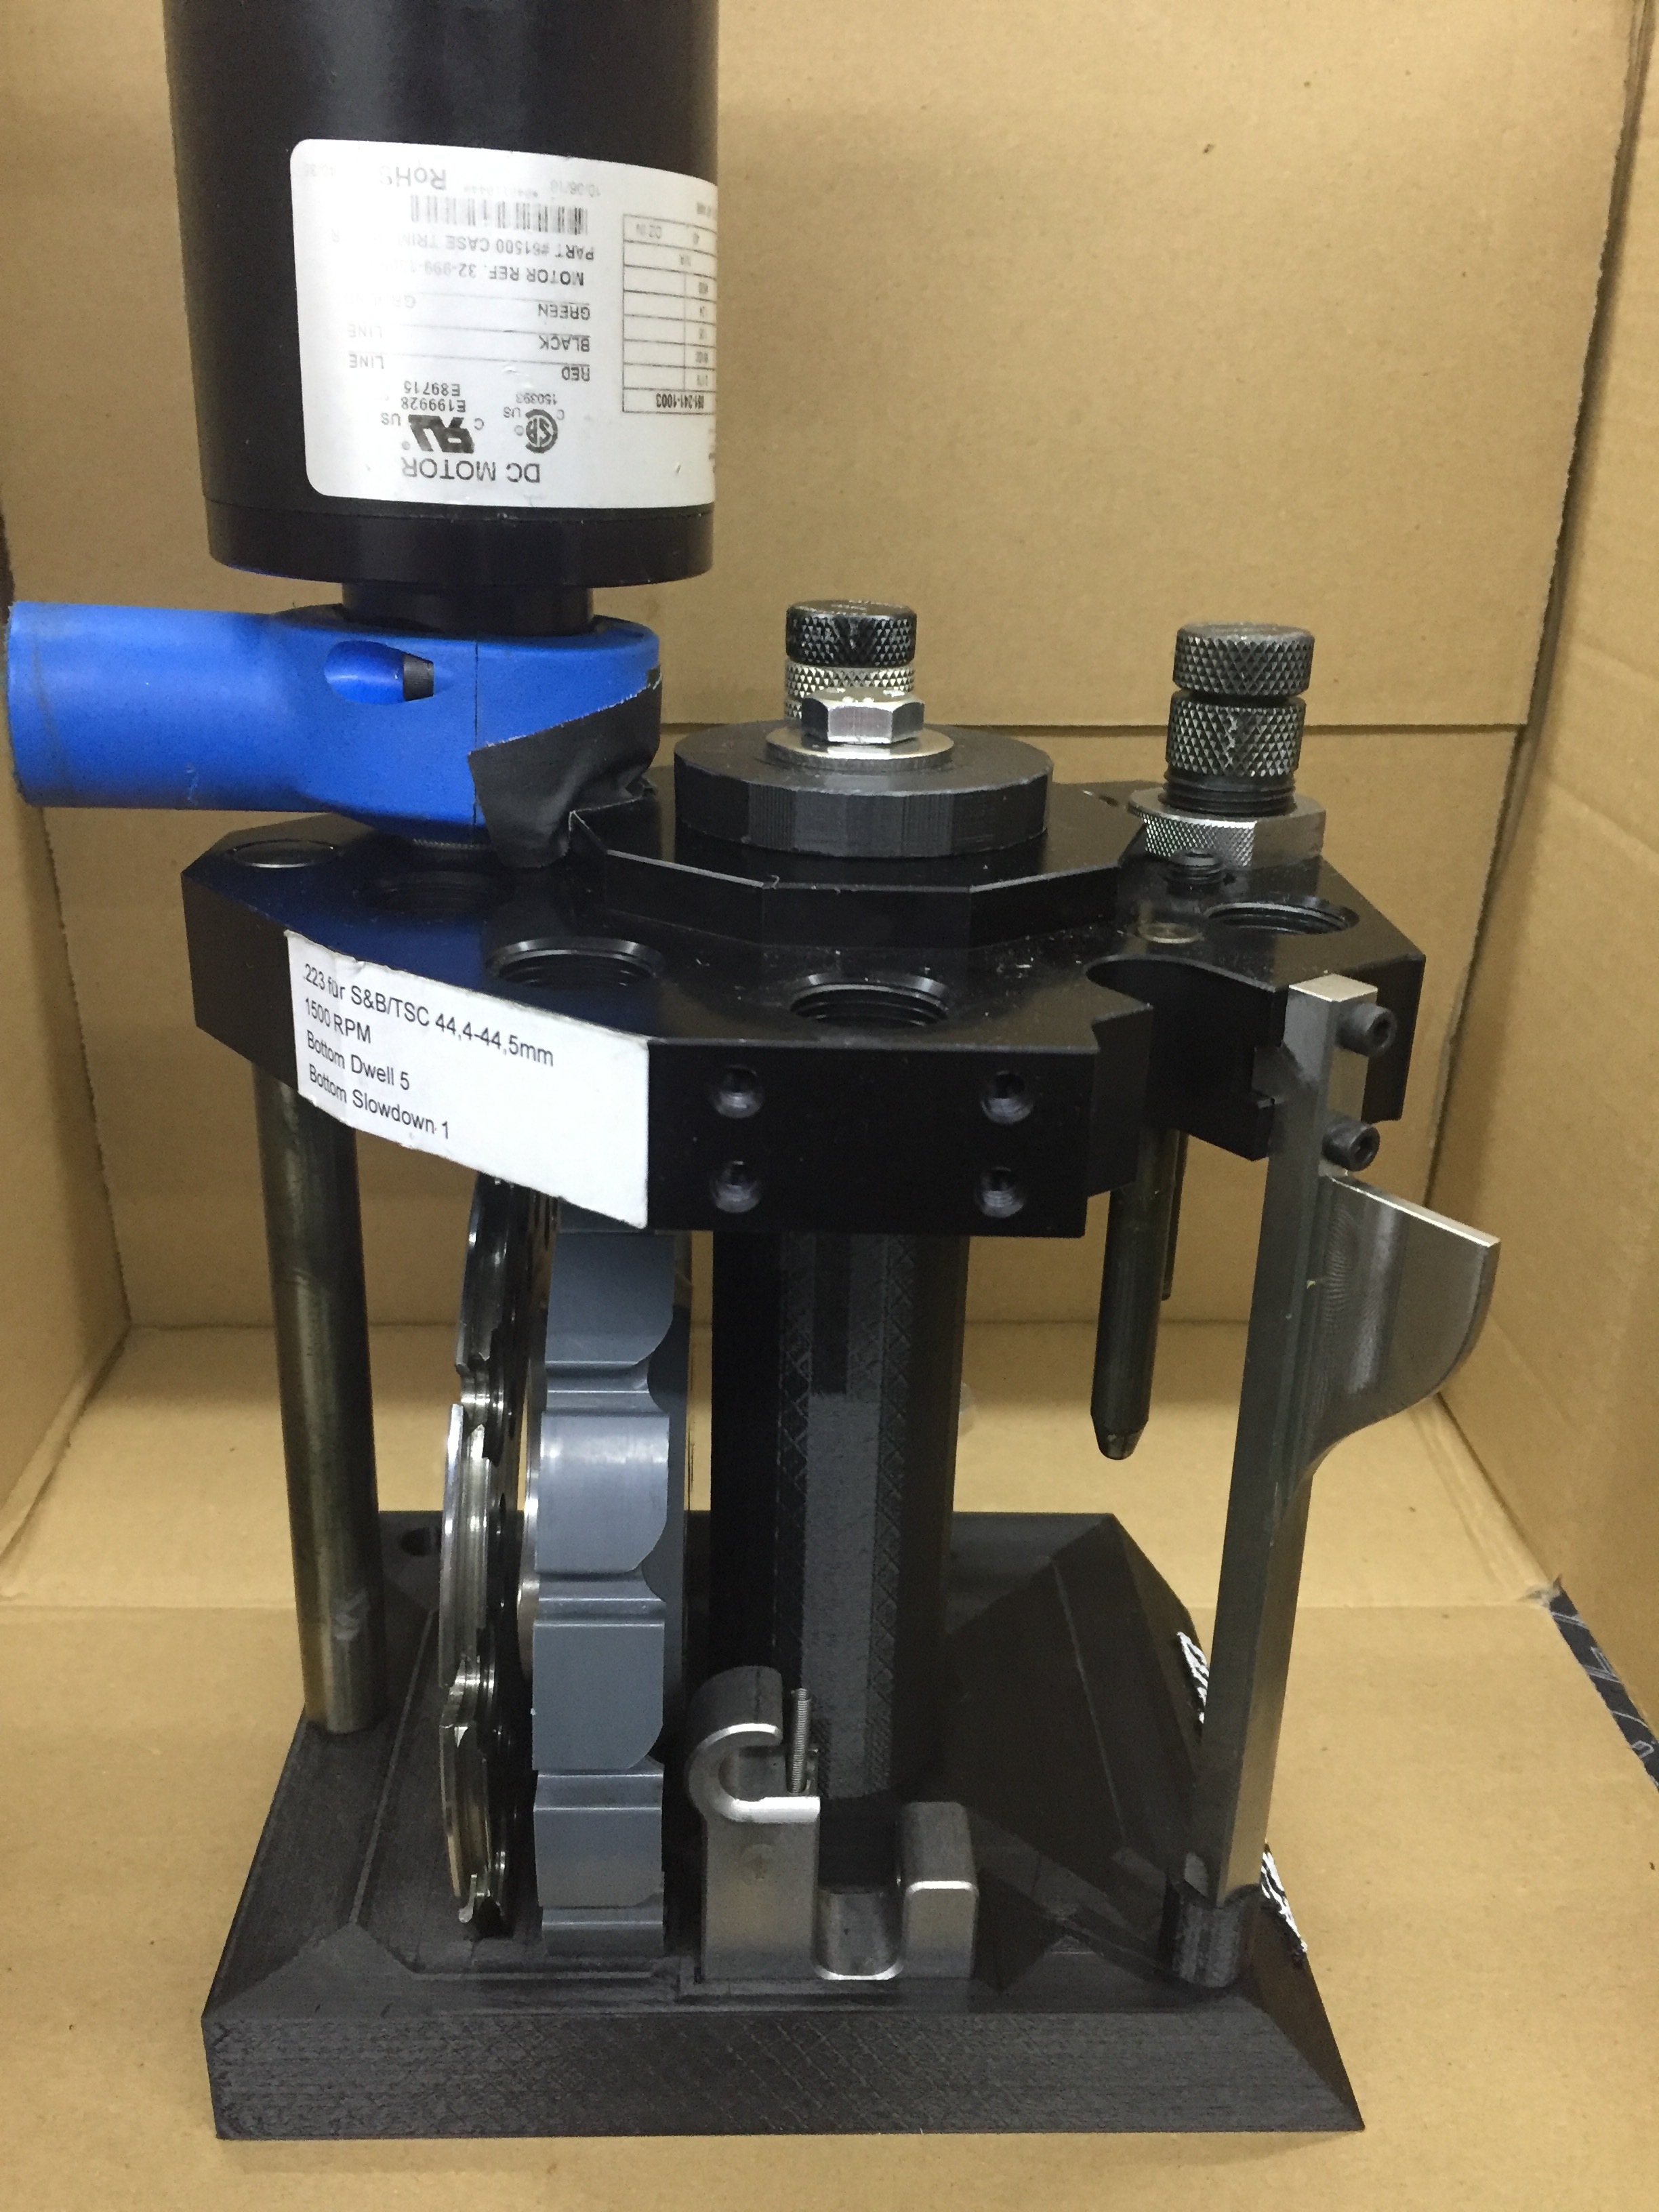
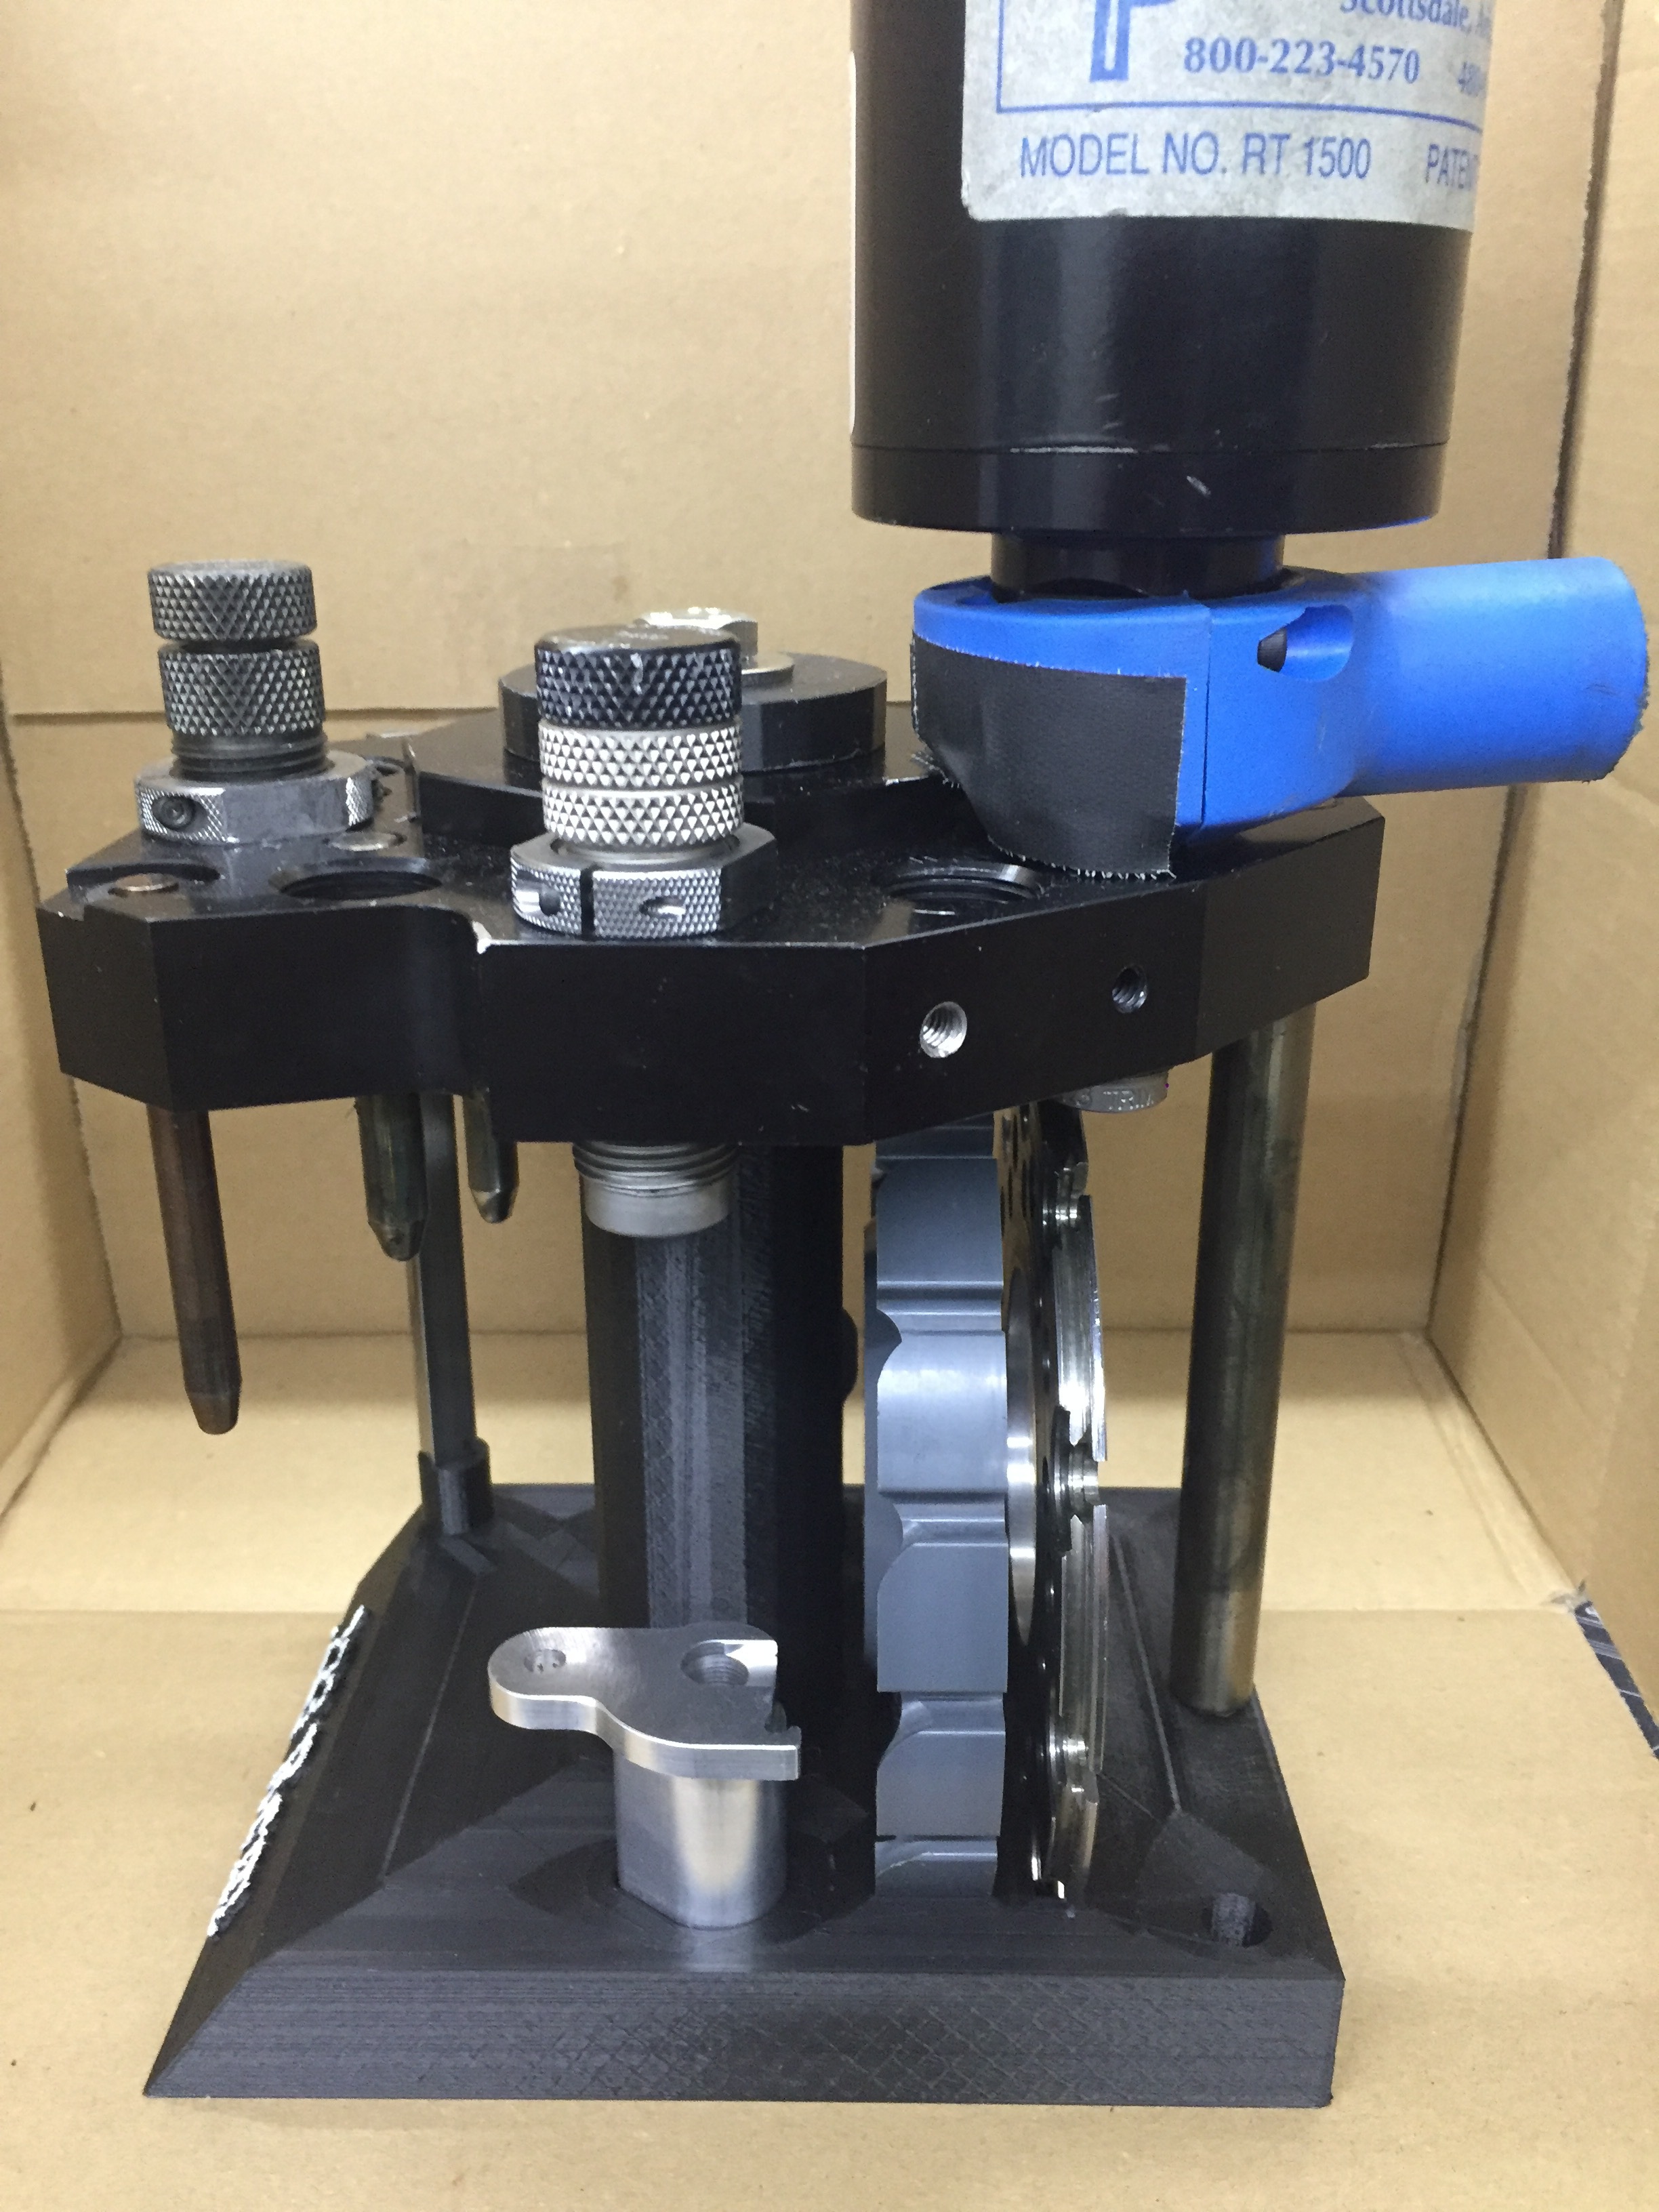
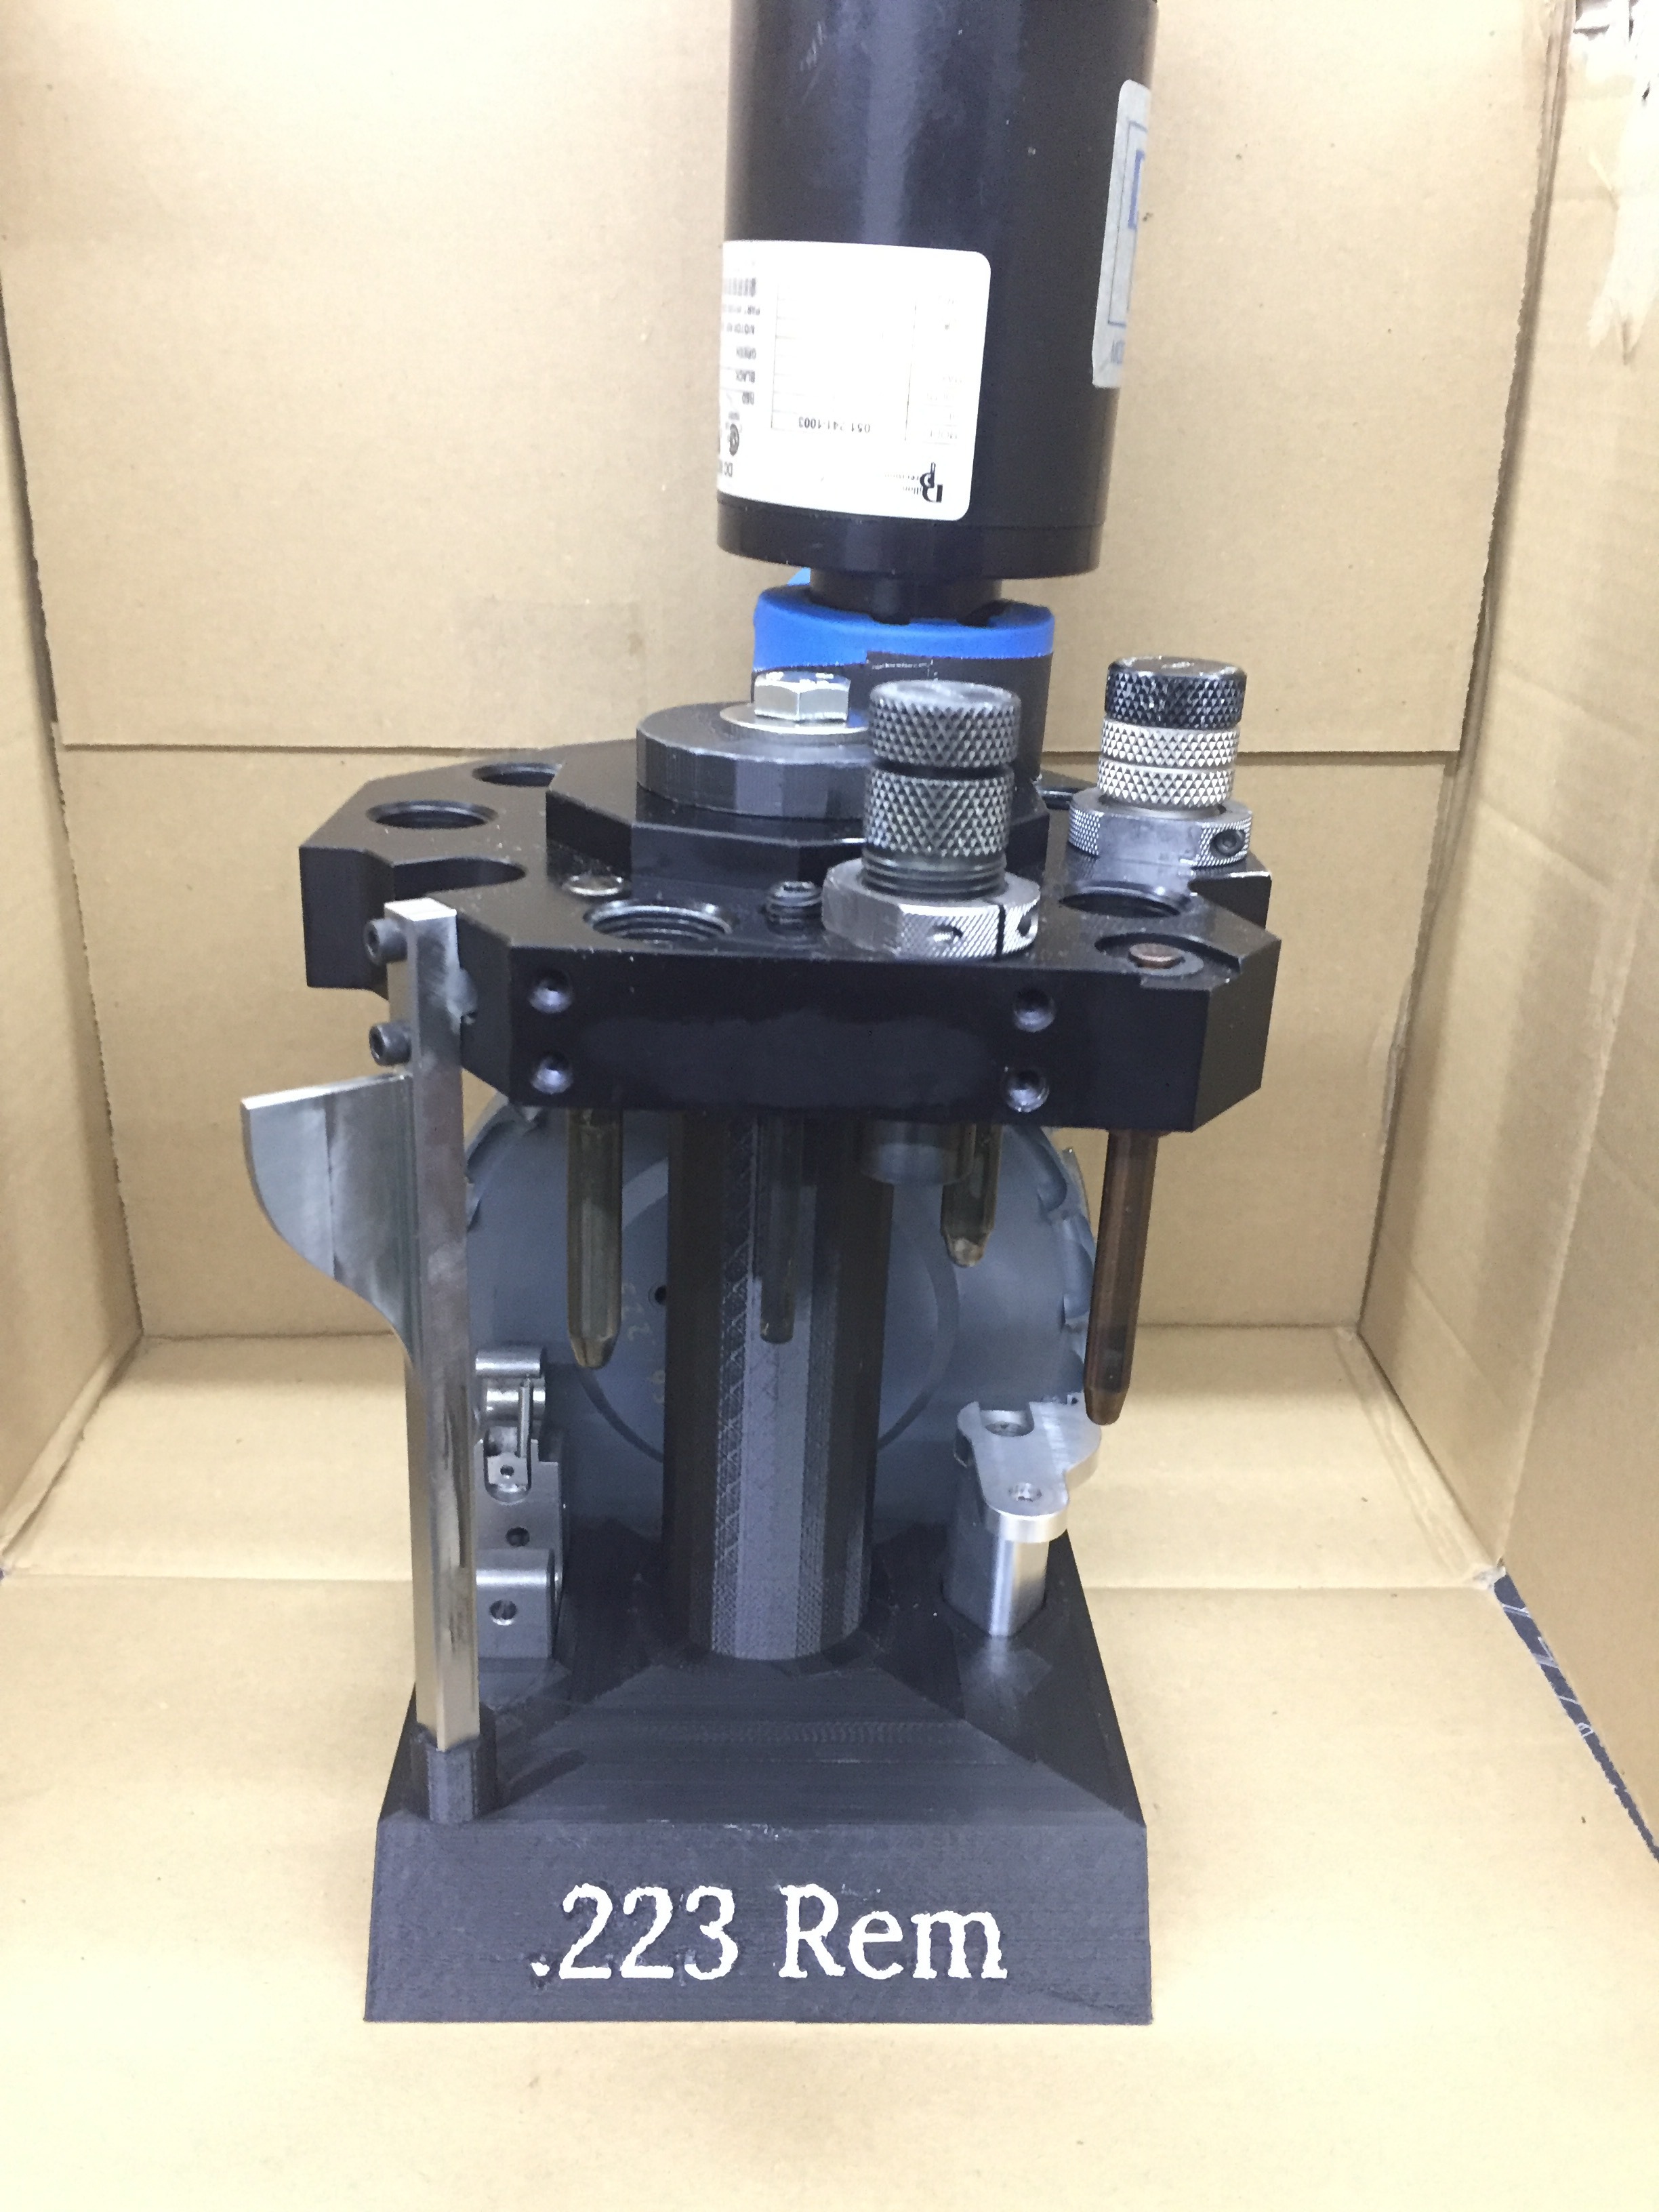
When it comes to trimming, life sucks a bit, I use the Dillon RT1500, I pre size the brass to 80-85% and than do the final sizing and trimming with the RT
I use sorted brass only and always use the same lube.
I learned quickly on my old 1050, that is isn‘t a good idea to mix different brass brands, since the length variation is massive.
With sorted brass and the RT1500 i got 0.2mm or 0.078inch of variation. According to Dillon about half of it comes from the bearing play in the RT trimmer.
Now i was wondering, what variation you get with the Bosch trimmer from M7. My goal would be 0.1mm or 0.04 inch.
This is still to much for a tapper crimp so I have to stick with the Lee FC crimp die, that need‘s to be replaced after every 10k rounds, but for me and my „as good as possible“ approach I would like to push it to the minimum.
I have spent countless hours on the 1050 and later on the M7 with all kind of settings with all kind of dies and i can truly say, as it is right now, it want get any better with the RT trimmer.
-
On 5/9/2020 at 10:34 PM, pfeife said:
Is there an easy way to separate the hopper filled with powder from the Powder measure? I have to lock away powder, but don't want to take out the complete Powder measure every time i'm done loading. I'm loading .223 on an Evo Pro, now and then the Powder Drum is stuck in the up position. I tried cleaning and greasing some moving parts (including those O-rings), without success. Where can i find complete disassembly instructions for the Powder Measure? Any help is appreciated!
Electronic or Mechanical Powder measure? If it is the Mechanical one, just use stronger springs. It is the powder that jams the movement. Worst case, send it back to M7 or DAA
-
Ultimaker 2+, before the toolheads, I never printed a single thing in 3D.
I read a bout it and watched some Yt videos, used the settings BASF provided for their Tough PLA and started with the first Toolhead stand..... 18h later it was done. Appart from design, the print was ok.
After a few small revisions, I printed the next one. Now I got 3x 223, 3x 9mm (on is in the making right now) and after I go for another 2x 308.
In between i printed out a primer kicker for the M7 primer collator. It looks like I got the large primer bowl. Every time a primer came standing upright to the primer kicker, it got caught and startet to spin like a tire... I used a cable tie that i glued onto the kicker and even it was working, I hated the solution because it was a cheap fix.
Long story short, if you are willing to spend the money, you will get a plug and print solution. But money can never replace common sense. I do 3D drawings with Sketchup since over 10 years and you should have a basic understanding of where will force occur, so you increase the infill in this areas (3D prints are not solid objects, rather than hull with a honeycomb inside to make it strong and lightweight)
@slavex I had that before on my old 1050 stand. Right now I have a load in 9mm that performs so exzeptionell well, that I will not touch any setting on this toolhead. I always try to reduce components down to a minimum and than buy em in large quantities.
The M7 EVO pro today, is a very fine pice of equipment. I only made about 25.000 cases (first pass) in 223 and 9mm and so far not even 12.000 live rounds. Next batch will be 10K .223 but due to the shut down, I can‘t finish my ladder testing. I load in batches of 5-10k with nice and slow 1000 rounds per hour.
I used to work with the Redding powder measure but switched to the M7 electronic version. So far the M7 delivers the accuracy as the Redding does, this counts for simple powder like Lovex D073.4 as well as for one of the worst ones called RS20 from swiss reload. It‘s a small flake powder, I had nothing but troubles with this one in the Dillon powder measure. The Redding was accurate to +-0.05gr with 100 tested charges, the M7 was at +0.07 -0.05gr. The dillon had up to 0.5gr variation with the same powder at 5gr target load.
One thing for sure, the M7 needs to be locked after a lot more than the 1050, what is perfectly fine. Maintenance, cleaning and lubing all spots regular are highly recommended.
Apart from the upside down primers every now and then (and M7 not answering my mail) I‘m very happy with the Evo Pro. I‘m quite sure, the reason for the upside down primers is, because I got the wrong bowl for the collator. Maybe someone can send me a picture of their (maybe even already replaced) small primer, primer collator.
-
On 4/25/2020 at 2:42 AM, kamber said:
@Steyrarms Fine job sir, that is awesome! I'd love a copy of the .STL if you don't mind.
Just send me a pm with your email address and I‘ll sendyou the files
-
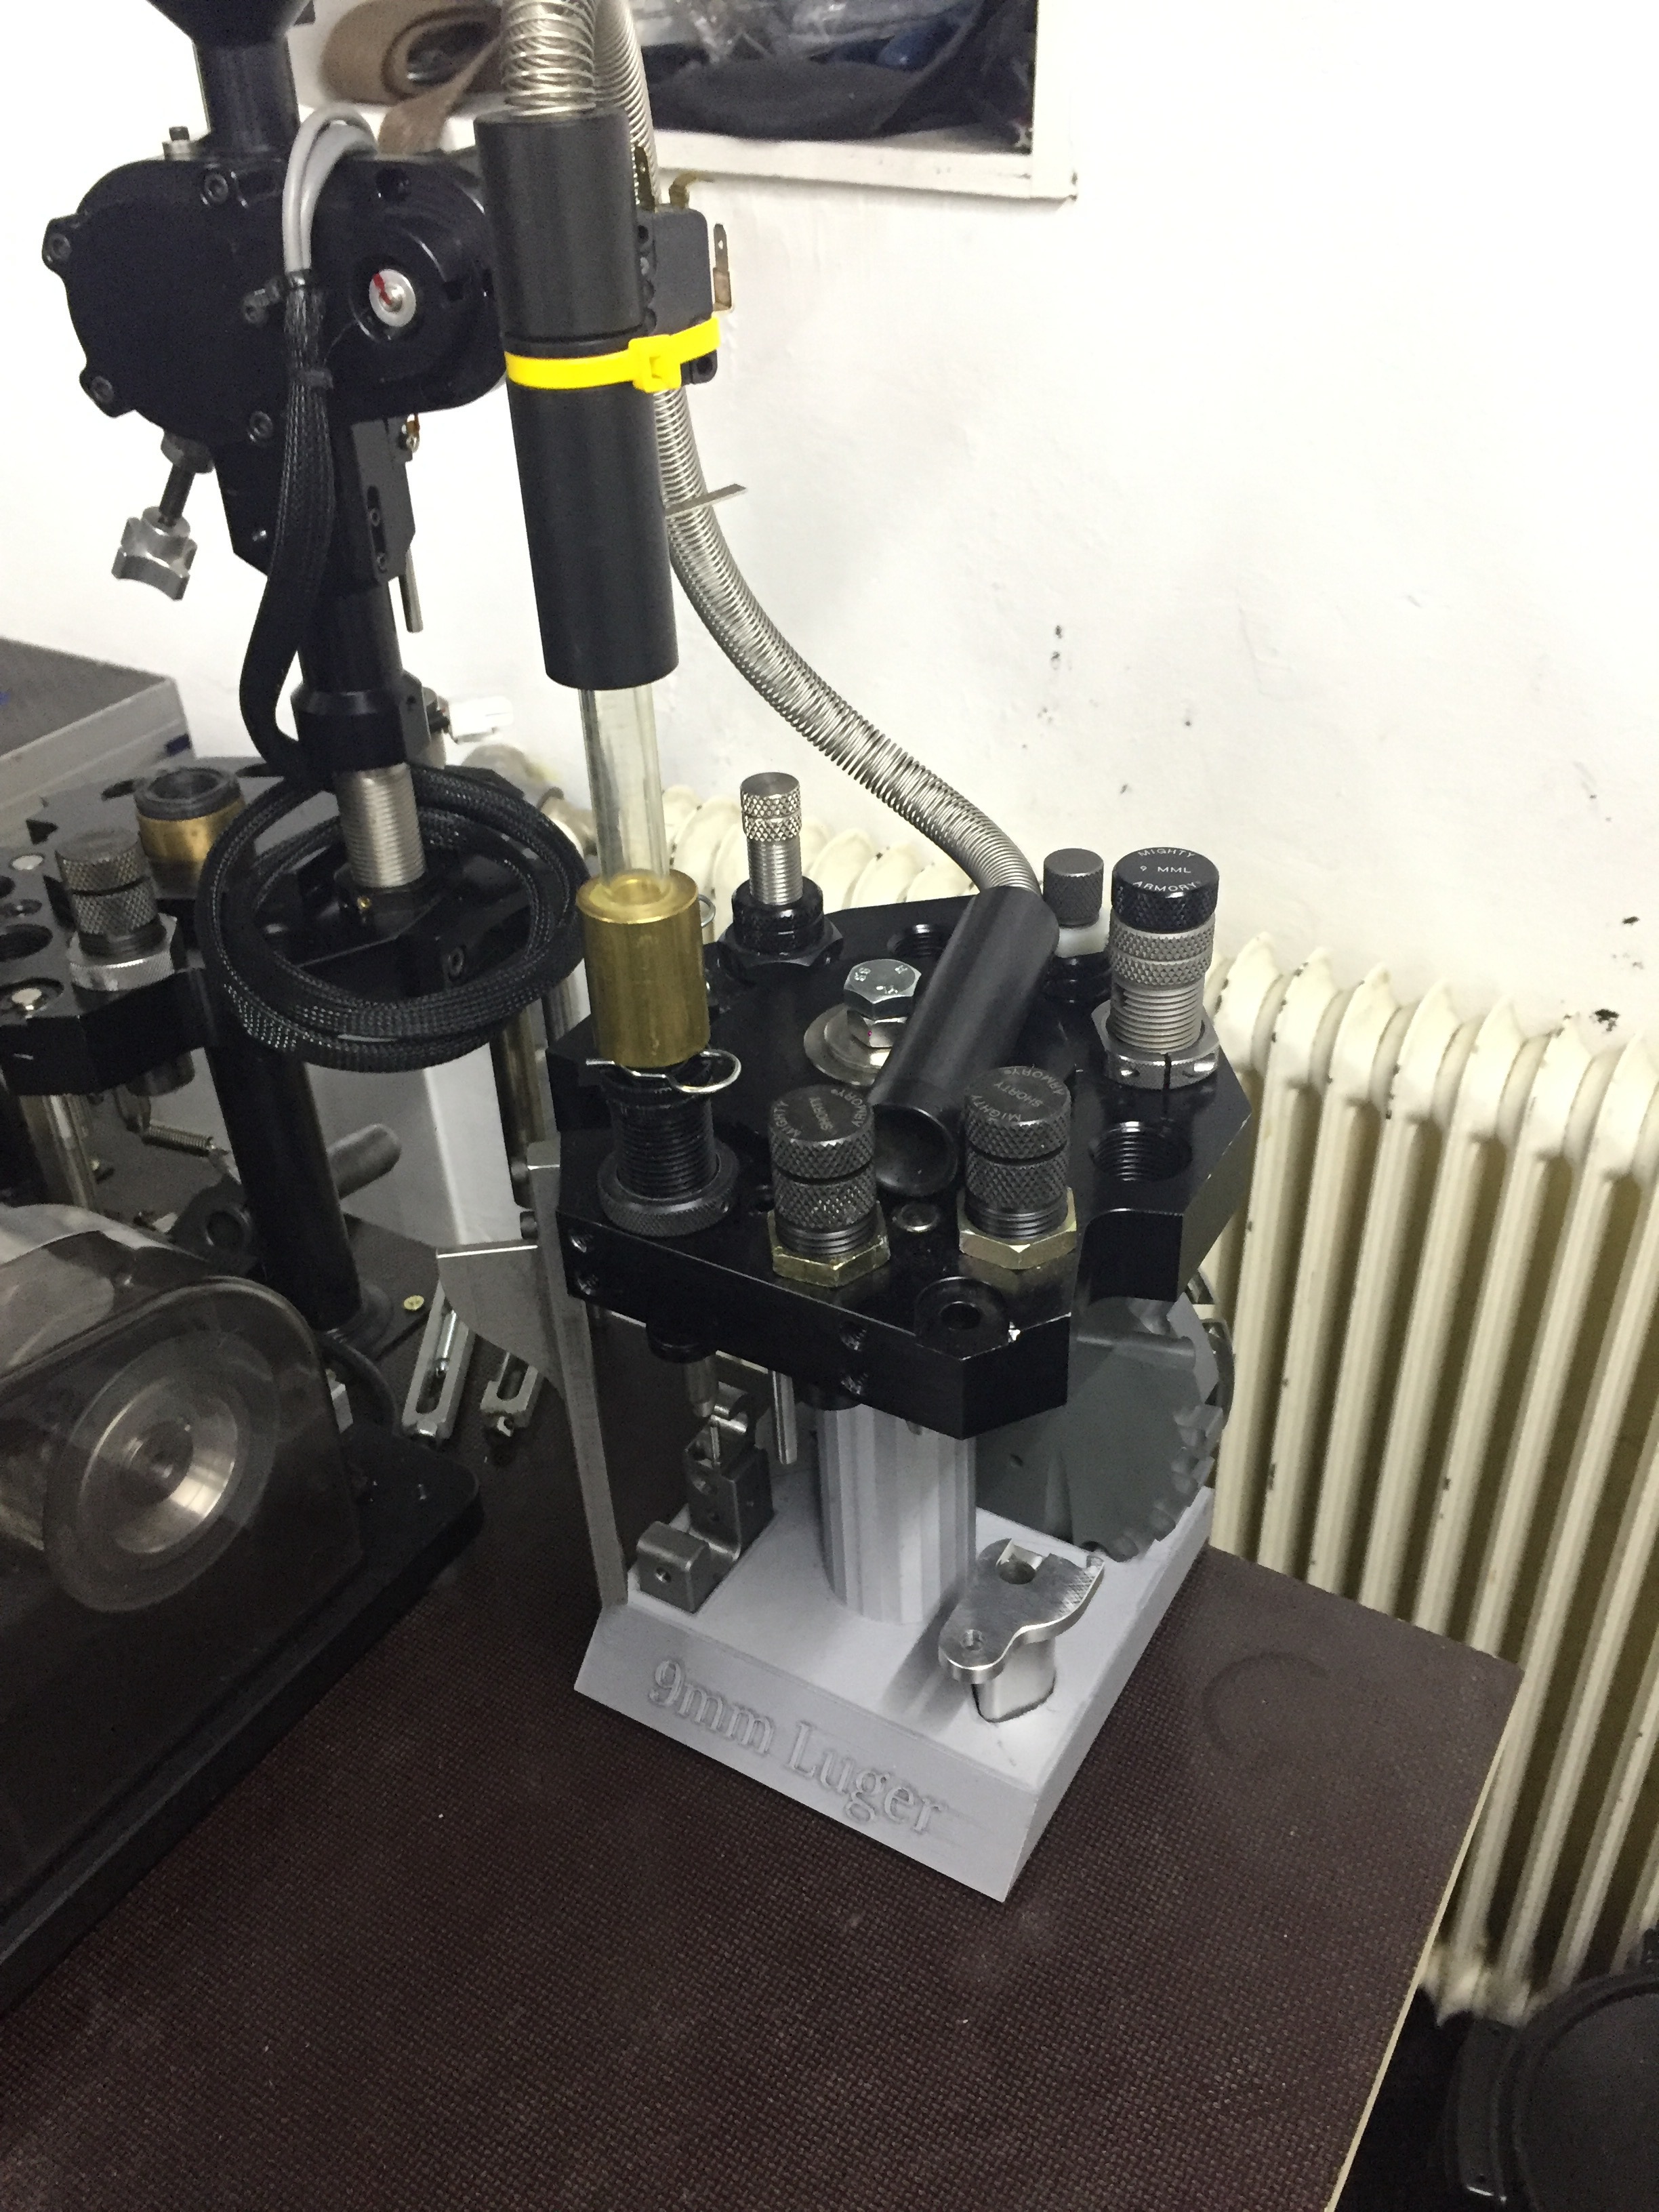
Allright, after showing my prototype toolhead stand last time, a fewthings have changed. Like M7 I made some improvements on the design.
Now I‘m at revision 3, it‘s the final one. I have added another bore for the small guide rod in the back, that accommodates the spring.
Made the whole base higher so it sits flush with the guide rod, changed position of the hump for the case feeder actuator bar and made it a bit higher.
I also modified the size of the shell plate and the Mr. bulletfeeder plate a bit.
For .printing, I used tough PLA from BASF, it is a lot stronger than PLA but does not shrink like ABS.
Material costs per stand are about 20 USD, and you have a storage place for your bulletfeeder plate too.
I have to print another 2 for .223, next will be 9mm Luger stands

If you wantthe files, let me know, sharing i careing
-
On 4/8/2020 at 3:53 AM, jcwallace84 said:
@Steyrarms If you need someone to test print one of those 9mm stands let me know! ; ) I have a 9mm system, and recently bought a spare for 223. I have a Prusa mk2S printer. I really wish I had time to build models for stuff like that!
@jcwallace84 this is just the first „will it or will it not work“ model.
I had to adjust some of the slots and added some support for the guiding rods and the case feeding thing. In the new version, the 1th guidrod and the case feeding thing will sit on a extension, the thin long guiding rod (where the spring is) will be guided into a hole. This ensures a snug fit in the right position.
If you are using cura, i could send you the print ready file. I will use tough pla with a 25% general fill rate and 75% in some areas with heavy load.
Send me a pm if you want the files, I will provide them for free,,, sharing is caring.
BTW i made a dedicated 223 stand too, because the bulletfeeder plate got a different dimension in thickness
-
My stick powder RS40 from reload swiss passed trough with no problems.
The problems started with Lovex D073.4 on an very unexpected point.
The blody powder roof does not seal aginst the tube, so the fine powder was leaking into the lower reservoir... it filled up the whole lower section with powder.
Used some sealant and problem solved.
Other than that, both the pistol and the rifle drum are working great
-
Since I life in Europe, all the good M7 stuff costs a lot extra. I got 3 Toolheads and I love the M7 Toolhead stand, but 100€ or 95USD x 3 is too much. So I desigend my own version, that not only stores the shell plate but also the Mr bulletfeeder plate, away.
This first version was only a test, to se if everything fits. Since we used a fill rate of less than 30%, the whole thing is not very robust. The final version will have a fill rate of 30% in most areas, 80% 1“ around the foot of the stand and about 1“ of the stand itself (in the bottom area). This should be more than enough to be rugged enough.
I was quite supprised, that even this lightweight demo unit did withstand the weight of the toolhead. I did hear some crunchy noise, when I tightened the top bolt to secure the Toolhead ....
The 223 Mr. bulletfeeder plate is different in thickness than the 9mm plate, so there will a own stand for 223
-
So a little update here, got some 2700 PPU .224 62 fmj-bt bullets and 12 pound of Lovex D073.4.
Made the pre-setup and adjusted the redding powder measure BR3 to 24.05gr.
First 10 charges in one pan and bang on 240,7gr.
2th 10 charges checked one by one —> min. was 24.04 and max was 24.11gr
Not bad for a AP press, and before you start moaning that my scale aint that precise... skip it, I use a Sartorius Entris 64 with a powder trickler for hand loads.
Certified and checked anualy, the entris is accurate down to +-0.002gr.
Frankly speaking, redding is the way to go if you like to fill the gap between cheap bulk ammo and time consuming hand match loads.... with the right components I would call it semi match.
-
Hi 2tuf4u - well I'm just the user of this System, but I asked the maker of the addaption kit if it was OK to post it here online --> he just gave me a go ahead.
The conversion is based on a Hornady linkage kit, all you Need is to replace the handle of the Redding powder measure by a customized link so it can fit the actuating arm and a new drop tube so it fits into the hornady powder drop die.
The green drop tube from Redding Needs to go, that is a pretty simple Task.
Since I'm using Swiss Reload RS20, a very good powder, that unfortunately is the worst for powder measure (fine thin flake powder), I had to add 2 more come back springs. With just the hornady spring in place, the powder measure would jam from time to time. With the 2 extra springs in place, I have done About 17.000 rounds so far and not a single charge was missing.
I load 5gr target with a Variation of +- 0.07 grain --> I use a Satorius entris 64 so I'm Pretty sure my measurements are correct.
Where are you located? I still Need some contact in the US to help me out a bit, in return I could provide the drawings for the kit :)
ATB
Steyrarms


-
Thanks for this more than usefull information.
I‘m from Austria so it will take some time to get the electronic powder measure. I‘m happy that i did not buy the Gen. 1 version as quite a few people hat troubles with them.
I only use S&B SP Primer, usually there are 2-3 flipped in a 1000... With 15k rounds this would be 75 Rounds or less than 16 Usd. ... so for me it‘s not worth it. The only real „problem“ i have, if there are only 40 or so primers in the bowl, i need to tune vibration down to keep the slid feeding. With a hair higher vibration it want work anymore. So I ensure there are always enough primer in the bowl.
Other than that, i love my evo pro
-
@slavex what powder you are using? I‘m from Austria an using swiss Powder RS20.
This stuff is straight from hell, super performance but gives every powder measure a hard time. Very fine flake powder....right now I‘m using a Redding Powder measure 10X that works realy good, but I‘m always open to try new stuff.
Thanks in advance


Mark7 Evolution - Tuning & Troubleshooting
in non-Dillon Reloading Equipment
Posted
Well done, now she runs even better than my press